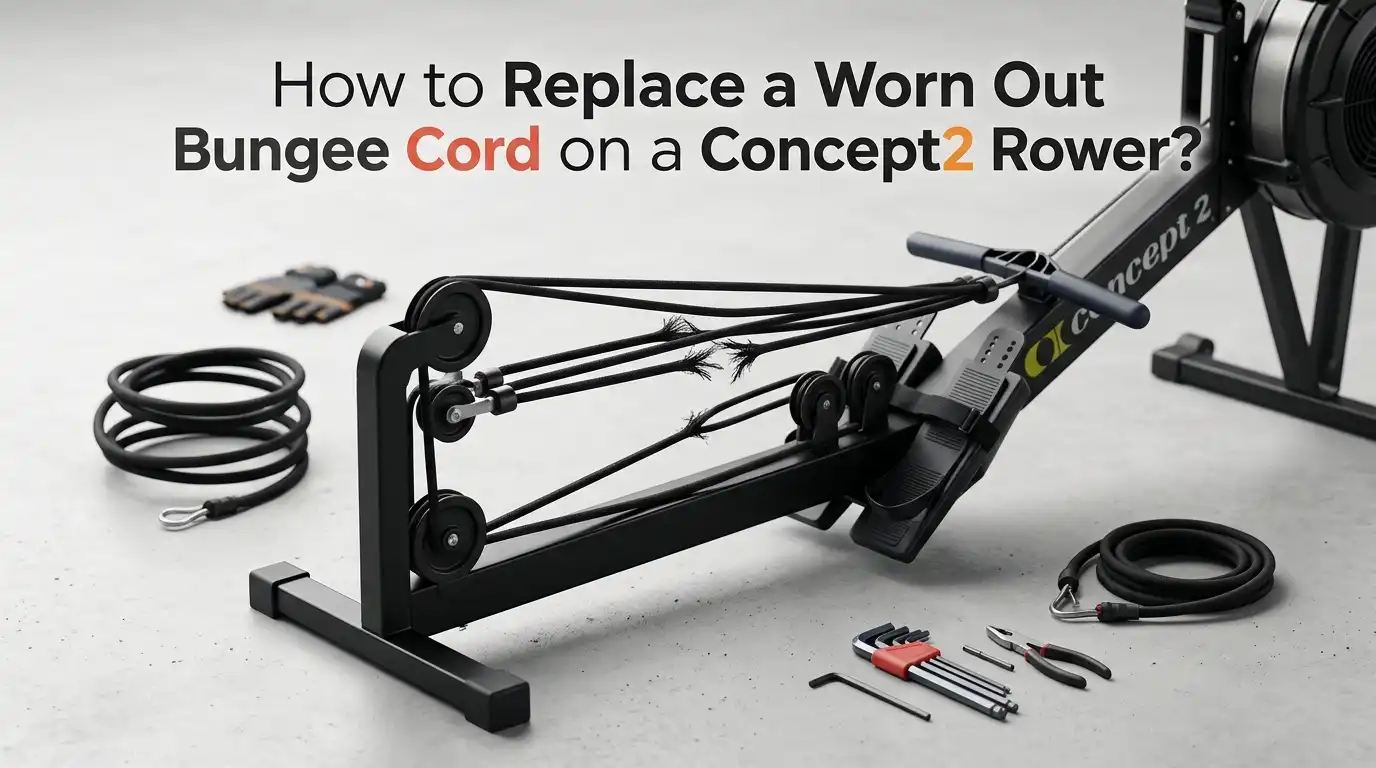
How to Replace a Worn Out Bungee Cord on a Concept2 Rower?
Your Concept2 rower has been your trusty fitness partner for years. But lately, something feels off. The handle barely returns after each stroke.
You hear a strange slapping sound inside the chain housing. Small elastic strands are appearing on the floor beneath your machine. These are all clear signs that your bungee cord (also called a shock cord) has reached the end of its life.
The good news? You do not need a technician. You do not need to ship your rower anywhere. Replacing the bungee cord on a Concept2 rower is a job you can finish at home with basic tools and about 30 to 45 minutes of your time.
In a Nutshell
- The shock cord (bungee cord) is the elastic rope inside your Concept2 rower that recoils the chain after every stroke. It runs through a series of pulleys inside the front end of the machine. Over time, this cord stretches, frays, and loses its tension. The average lifespan is around 5 to 12 years for home users, depending on usage and storage conditions.
- You will need only a few basic tools to complete this replacement. A 5/32 inch (4 mm) hex wrench or a T27 Torx driver, a 7/16 inch (11 mm) wrench, and the replacement shock cord from Concept2 (part number 1731 for Model C, D, E, and RowErg) are all that is required. The cord is 12 feet 6 inches long and comes ready to install.
- Proper routing of the new cord is the single most important step. If you thread the cord incorrectly around the pulleys, it will wear out within weeks instead of years. Many premature failures reported by users trace back to incorrect routing during installation.
- You should also inspect the shock cord pulleys for burrs or damage while the cord is out. Mold imperfections on the plastic pulleys can cut into the cord and cause early fraying. A quick deburr with fine sandpaper solves this problem.
- Concept2 recommends checking and tightening the shock cord every 250 hours of use. This simple adjustment can extend the life of your cord significantly before a full replacement becomes necessary.
- The entire replacement process takes about 30 to 45 minutes for a first timer. Experienced users or technicians can finish it in under 20 minutes. The job does not require advanced mechanical skill, and Concept2 provides detailed PDF instructions and video guides on their support website.
What Does the Bungee Cord Do on a Concept2 Rower
The bungee cord, officially called the shock cord by Concept2, serves one essential purpose. It pulls the chain and handle back after you complete each rowing stroke. Without it, the handle would stay wherever you released it, and you would have to manually pull it forward every single time.
The cord runs through a pulley system inside the front section of the machine. It connects to a travelling pulley assembly that links to the chain. Every time you pull the handle, you stretch the cord. Every time you release, the stored elastic energy in the cord recoils the chain smoothly back into the flywheel housing.
This constant stretching and releasing happens thousands of times during a single workout. Over months and years, that repeated stress degrades the rubber inside the cord. The elastic fibers break down, the cord loses its snap, and your rowing experience suffers.
Signs Your Bungee Cord Needs Replacement
The most obvious sign is a handle that does not fully return to the fan cage after your stroke. You might notice the chain hanging loose or the handle stopping short of where it used to rest. This happens because the cord has stretched beyond its useful range and can no longer generate enough recoil force.
Another common indicator is finding small elastic strands or pieces of rubber on the floor beneath your rower. This means the cord is fraying internally. Some users report seeing blue or green dust accumulating inside the chain housing, which comes from the outer sheathing of the cord rubbing against pulleys.
You may also feel a difference in the smoothness of the recovery phase. A fresh cord creates a firm, consistent pull. A worn cord feels sluggish and uneven.
If your rower is more than 10 years old and still on the original cord, it is very likely due for replacement, even if it seems to work fine. The rubber degrades with age regardless of how many meters you have rowed.
How Long Does a Concept2 Shock Cord Last
The lifespan of a Concept2 shock cord varies based on usage frequency, rowing technique, and storage conditions. Home users typically get 5 to 12 years from a single cord. A Concept2 service technician noted on the official forum that the cord retains useful tension for about 10 to 12 years before it drops to roughly half its original return force.
Institutional machines in gyms and rowing clubs see much more abuse. These cords may need replacement every 2 to 5 years due to the volume of daily use. Some gym owners with 10 machines report replacing cords on a rotating schedule to stay ahead of failures.
Environmental factors matter too. Extreme cold, heat, and UV exposure accelerate rubber degradation. A rower stored in a garage that swings between freezing winters and hot summers will wear through cords faster than a machine kept in a climate controlled room.
Concept2’s official maintenance guide recommends checking and tightening the shock cord every 250 hours of use and replacing it when adjustment alone no longer restores full handle return.
Tools and Parts You Will Need
Gathering the right tools before you start saves time and frustration. The list is short. You need a 5/32 inch (4 mm) hex wrench or a T27 six lobe (Torx) driver to remove the screws holding the chain housing cover. You also need a 7/16 inch (11 mm) wrench for the shock cord anchor mechanism (called the S.C.A.M. by Concept2).
For the replacement part, you need the official Concept2 shock cord. For Model C, D, E, and RowErg rowers, this is part number 1731. The cord measures 12 feet 6 inches long. The Model B uses a different cord (10 feet long with two pulleys included), so make sure you order the correct one for your model.
A flashlight is helpful for seeing inside the dark chain housing. A small piece of tape or a marker can help you note the routing path of the old cord before you remove it.
Some experienced technicians recommend tying the new cord to the end of the old one before pulling it out, which lets you thread the new cord through the pulleys as you extract the old one.
Should You Adjust or Replace the Cord
Before committing to a full replacement, consider whether a simple adjustment might solve your problem. Concept2 provides a shock cord adjustment procedure in their official PDF documents. This involves tightening the cord at its anchor point to take up slack caused by stretching.
Pros of adjusting first: It is faster, takes only a few minutes, requires no new parts, and can restore full handle return if the cord still has enough elasticity left. This is a great first step if your rower is under 8 years old and the cord shows no visible fraying.
Cons of adjusting only: It is a temporary fix. You can only tighten the cord so many times before there is no adjustment range left. If the cord is frayed, brittle, or more than a decade old, adjustment will not address the underlying problem. The rubber has degraded and needs fresh material.
A full replacement is the right call when adjustment no longer holds, when the cord is visibly damaged, or when you notice debris from the cord inside the housing. Think of adjustment as buying time and replacement as the permanent solution.
Preparing Your Rower for the Replacement
Start by placing your rower on a clean, flat surface with plenty of light. You will be working on the front section of the machine near the flywheel housing. Pull the handle all the way out to the end of the monorail and secure it there. This takes tension off the shock cord and makes removal easier.
Flip the front end of the rower onto its nose so it stands upright. This position gives you clear access to the underside of the chain housing where the shock cord pulleys sit. Some users prefer to separate the monorail from the front section entirely, which gives even more room to work.
Remove the chain housing cover by unscrewing the fasteners with your hex wrench or Torx driver. Set the screws somewhere safe because they are small and easy to lose. Take a moment to study the existing cord routing before you touch anything. Snap a photo with your phone. This photo will be your reference when you thread the new cord through the same path.
Removing the Old Bungee Cord Step by Step
Locate the shock cord anchor mechanism (S.C.A.M.) at the front of the machine. This is the point where one end of the cord is secured. Use your 7/16 inch wrench to loosen it and free that end of the cord. Pull the cord gently to create slack.
Now trace the cord through the pulley system. It loops around a shock cord pulley and a travelling pulley assembly. Carefully unhook the cord from each pulley. Do not force it. If it seems stuck, check for knots or tangles that may have formed over years of use.
Once both ends are free and the cord is off all pulleys, pull it completely out of the machine. Inspect the old cord closely. Note any spots where the rubber is exposed, where the outer braid has worn thin, or where the cord has flattened from constant pulley contact. This inspection helps confirm that replacement was the right decision and shows you which areas see the most stress.
Installing the New Shock Cord Correctly
Take your new 12 foot 6 inch cord and identify both ends. Begin by threading one end through the shock cord anchor mechanism (S.C.A.M.) and secure it firmly with your wrench. Do not overtighten because you can strip the hardware, but make it snug enough that the cord will not slip.
Now route the cord through the pulley system. Follow the shock cord routing diagram from Concept2’s official PDF or the photo you took earlier.
The cord goes around the shock cord pulley and then around the travelling pulley assembly. The direction matters. The cord must wrap the pulleys from the correct side to avoid rubbing against the housing or crossing over itself.
Pay close attention to the direction of the S.C.A.M.S. (shock cord anchor mechanism screws) during reinstallation. Concept2’s replacement guide specifically notes the direction these should face. Getting this wrong can cause the cord to bind or wear prematurely. Take your time here because this is the step where most mistakes happen.
The Pro Technician Trick for Easier Threading
An experienced Concept2 service technician shared a useful shortcut on the official forum. Before removing the old cord, tie the new cord to one end of the old one. Use a simple, tight knot that will not come apart under tension.
Then, as you pull the old cord out from the opposite end, the new cord follows it through the entire pulley path automatically. This saves you the trouble of manually routing the new cord around each pulley while working in a tight, awkward space.
Pros of this method: It is faster, eliminates routing errors, and avoids the frustration of threading a cord through small pulley gaps while the rower is upside down. Several forum users praised this approach as a significant time saver.
Cons of this method: You cannot inspect the pulleys as easily while the cord is passing through. If the pulleys have burrs or damage, you might miss them.
You also need to make sure the knot connecting the two cords is small enough to pass through every gap without getting stuck. If it jams, you have to start over. For first timers, the standard method with full disassembly may give a better view of the internal components.
Inspecting and Deburring the Pulleys
While the old cord is out, take a close look at the shock cord pulleys inside the housing. These small plastic wheels guide the cord along its path. Over time, they can develop burrs from the injection molding process or from wear.
A forum user who services Concept2 rowers professionally recommended deburring the pulleys every time you replace the cord. Use a sharp blade to trim any raised edges or plastic imperfections, then smooth the surface with the finest grit sandpaper you have. This small step can dramatically extend the life of your new cord.
You will know the pulleys need attention if you notice colored dust from the cord collecting inside the housing. Blue or green dust is a sign that the cord’s outer sheath is being abraded by rough pulley surfaces.
After deburring, the dust problem typically disappears completely. Also spin each pulley by hand to make sure it rotates freely. A seized pulley creates a fixed friction point that grinds through cord material quickly.
Testing and Adjusting After Installation
With the new cord in place and the housing cover reattached, it is time to test. Pull the handle out slowly to full extension and then release it. The handle should snap back smoothly and firmly all the way to the fan cage. There should be no lag, no slack, and no strange sounds.
Row a few easy strokes and pay attention to the recovery phase. The chain should retract evenly without any jerking or hesitation. If the handle does not return all the way, the cord may need a slight tightening at the anchor point. Use your wrench to adjust the S.C.A.M. in small increments until the return feels right.
Listen for any rubbing or scraping noises. These could indicate that the cord is not seated properly in a pulley groove or that it is rubbing against the inside of the housing. If you hear anything unusual, stop rowing immediately, remove the cover, and check the routing. A misrouted cord will fail quickly and could potentially damage the chain or pulleys.
Common Mistakes to Avoid During Replacement
The number one mistake is incorrect routing of the shock cord. Multiple users on the Concept2 forums have reported brand new cords fraying within weeks because the cord was not threaded through the pulleys on the correct side. Always reference the official routing diagram from Concept2.
Another common error is overtightening the anchor mechanism. Snug is good. Cranking it down with excessive force can damage the cord fibers right at the anchor point, creating a weak spot that leads to early failure.
Some people skip the pulley inspection. This is a missed opportunity. If a burr on a plastic pulley caused your old cord to fray, installing a new cord over the same burr just starts the wear cycle all over again. Take the extra five minutes to check and smooth the pulleys.
Finally, do not buy third party shock cords to save a few dollars. Concept2’s official cord is engineered for the correct length, diameter, and elasticity. Off brand cords may work initially but often stretch at different rates or wear unevenly, leading to a poor rowing experience and shorter lifespan.
Maintenance Tips to Extend Your New Cord’s Life
After investing time and effort into a fresh shock cord, a few simple habits will help it last as long as possible. Every 250 hours of use, check the cord tension and tighten it if the handle return feels weak. This is part of Concept2’s official maintenance schedule and takes only a couple of minutes.
Store your rower in a dry, temperature stable environment. Garages with wild temperature swings and direct sunlight exposure are hard on rubber components. If you must store the machine in a garage, consider covering the front end to block UV rays.
Keep the chain lubricated with purified mineral oil or 3 IN ONE oil every 50 hours of use. A well oiled chain reduces friction on the entire return mechanism, which means less strain on the shock cord during every recovery stroke.
Finally, row with good technique. Slamming the handle forward on recovery puts unnecessary shock loads on the cord. A smooth, controlled release extends cord life significantly.
When to Call Concept2 Support Instead
Most shock cord replacements go smoothly with the steps above. But there are situations where you should reach out to Concept2 directly. If your cord failed within weeks of installation, there may be a quality issue. Concept2 has been known to send free replacements when a cord is clearly defective.
If you own a Dynamic Indoor Rower, the shock cord is a different part entirely. It is not available in Concept2’s online shop and must be ordered through their customer support team. The length and attachment method differ from the standard RowErg cord, so do not try to substitute one for the other.
You should also contact Concept2 if you notice damage to the travelling pulley assembly, the chain idler pulley, or the sprocket during your inspection. These components are harder to replace and may require guidance from the support team.
Concept2’s customer service is excellent and their phone number is 800 245 5676 for users in the US and Canada. They also respond to email inquiries. Do not hesitate to ask for help if anything looks unusual inside the machine.
Frequently Asked Questions
How much does a replacement shock cord cost for a Concept2 rower?
The official Concept2 shock cord for Model C, D, E, and RowErg rowers is an affordable replacement part. Prices may vary slightly over time, so check the Concept2 website directly for current pricing. The cost is modest compared to the value of keeping your rower in proper working condition. You can order the part directly from Concept2’s online shop or by calling their customer support team.
Can I use a generic bungee cord instead of the official Concept2 shock cord?
Using a generic bungee cord is not recommended. The official Concept2 cord is made to a specific length of 12 feet 6 inches, a precise diameter, and a particular elasticity rating. A generic cord may be too stiff, too stretchy, or the wrong thickness to fit the pulley grooves properly. This leads to uneven wear, poor handle return, and potential damage to the internal pulleys.
How do I know if my Concept2 model uses the same shock cord?
The Model C, Model D, Model E, and RowErg all use the same shock cord (part 1731). The Model B uses a shorter cord with included pulleys (part number differs). The Dynamic Indoor Rower uses an entirely separate cord that must be ordered through Concept2 customer support. Check your rower’s model designation on the frame sticker near the flywheel housing.
Is it possible to replace the shock cord without flipping the rower upside down?
Technically, you can work on the cord with the rower lying flat. However, most people find it much easier to stand the rower on its front end (on its nose) because this position gives clear access to the underside of the chain housing. Working flat means fighting gravity to route the cord through pulleys you can barely see. Standing the rower up is the approach shown in Concept2’s own instructional videos.
How often should I check my shock cord for wear?
Concept2’s maintenance schedule recommends inspecting and tightening the shock cord every 250 hours of rowing. For institutional settings like gyms and rowing clubs, this check should happen monthly. Home users who row several times a week should inspect the cord at least twice a year. Look for visible fraying, rubber debris inside the housing, and reduced handle return force during your inspection.
Can a worn shock cord damage other parts of the rower?
A worn or broken shock cord will not directly damage the flywheel or sprocket. However, it can cause the chain to hang loose and slap around during the recovery phase. Over time, this can lead to the chain jumping off the idler pulley or tangling inside the housing. A completely broken cord means the handle will not return at all, making the rower unusable until the cord is replaced. Addressing cord wear early protects the rest of your machine.

Hi, I’m Sarah Hill — the founder and voice behind Heavy Lift Vault. I’m passionate about fitness, strength training, and health technology. I spend my time researching, testing, and reviewing workout equipment and health devices so you don’t have to guess. My goal is to deliver honest, detailed, and trustworthy reviews that help you invest wisely in your fitness journey.