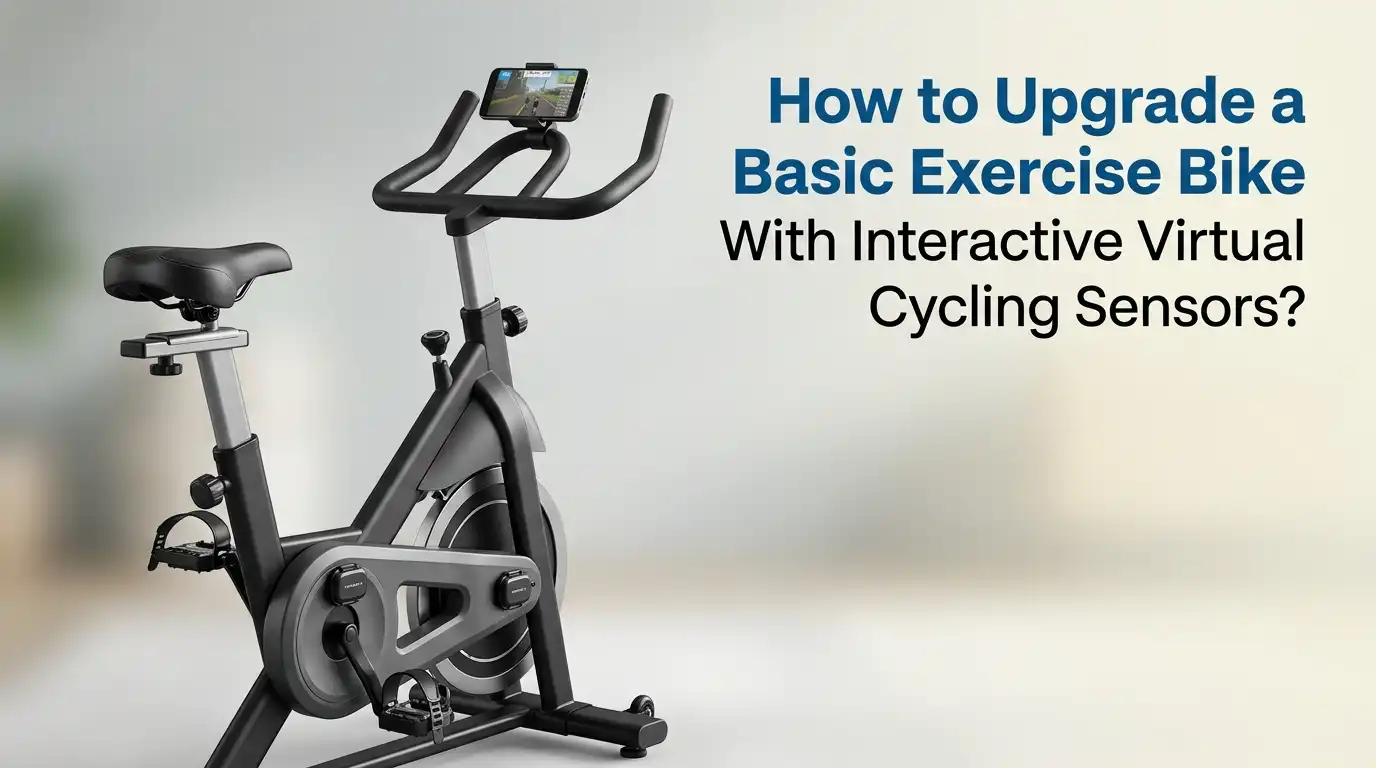
How to Upgrade a Basic Exercise Bike With Interactive Virtual Cycling Sensors?
You stare at your dusty exercise bike in the corner. It still works fine. The pedals spin. The resistance knob turns. The little LCD screen still shows time and calories. But every ride feels the same.
You pedal, you sweat, you get bored, and you quit. Meanwhile, your friend shows off screenshots of her virtual rides through mountain passes with hundreds of other cyclists.
You think you need to spend two thousand dollars on a fancy smart bike to join that fun. You do not. You can transform your basic exercise bike into an interactive virtual cycling powerhouse for under fifty dollars.
In a Nutshell:
- You do not need to buy an expensive smart bike to enjoy virtual cycling. A basic exercise bike paired with Bluetooth speed and cadence sensors works with all major cycling apps including Zwift, Rouvy, MyWhoosh, and Peloton.
- The total sensor cost ranges from thirty to sixty dollars for a complete setup. You simply attach these small wireless sensors to your bike, pair them with your phone or tablet, and start riding.
- A speed sensor is the one essential sensor you must buy. Apps use wheel rotation data to estimate your power output and move your avatar through virtual worlds.
- A cadence sensor and heart rate monitor add valuable training data but are optional. Several free virtual cycling apps exist that work perfectly with sensor-upgraded bikes.
- MyWhoosh offers a completely free platform with realistic graphics and structured workouts. You never have to pay a subscription. The installation process takes under fifteen minutes.
Why Your Basic Exercise Bike Deserves a Smart Upgrade
Most basic exercise bikes provide only a tiny LCD display with time, distance, and an approximate calorie count. That data feels meaningless after a few rides. You have no way to track progress, join group workouts, or explore virtual routes.
The upgrade solves all of these problems. You attach a small Bluetooth speed sensor to the flywheel or crank. The sensor sends rotation data to your smartphone or tablet.
Your device runs a virtual cycling app that receives this data and converts it into onscreen speed and estimated power. Your avatar moves through a digital world in real time. You can race, climb hills, join group rides, and follow structured training plans.
Pros: The cost is extremely low. You keep using equipment you already own. Installation requires zero tools. Apps auto-detect your sensors within seconds. You gain access to global cycling communities. Your training data saves automatically to fitness platforms like Strava.
Cons: Your bike will not change resistance automatically to match virtual terrain. You must turn a manual resistance knob yourself. Virtual power calculations remain estimates, not exact wattage numbers. Some premium app features may not work with speed-only sensor setups.
What Sensors Do You Actually Need for Virtual Cycling
You face three main sensor choices when upgrading your exercise bike. The speed sensor is the absolute minimum. It attaches to your flywheel or wheel hub and counts rotations.
The app uses wheel circumference and rotation speed to calculate your virtual speed and estimate power output. Without this sensor, no virtual cycling app can function properly. The cadence sensor tracks how many pedal revolutions you make per minute.
This helps you maintain efficient pedaling rates and improves your training quality. Many apps display your cadence right next to speed on the dashboard. A heart rate monitor worn around your chest provides the final piece of data.
It shows how hard your body works during each session. This helps you stay in the right training zone for your goals. You can start with just a speed sensor and add the others later. Budget sensors from brands like Coospo or Magene cost around twenty dollars each.
Pros: The cheapest entry point into virtual cycling. Quickest installation. Simplest pairing process. Works with every major cycling app.
Cons: No cadence data on screen. Less precise virtual power calculations. Cannot track pedaling efficiency improvements. You miss key metrics that make training more effective.
How to Choose the Right Speed Sensor for Your Exercise Bike
Speed sensors come in two main designs. Wheel-based sensors attach to your hub and use a spoke magnet. Crank-based accelerometer sensors attach directly to the crank arm or hub without magnets.
Modern accelerometer sensors from Wahoo, Garmin, and Magene clip on with rubber bands or zip ties. They detect rotation through movement and gravity. These work perfectly on exercise bikes with enclosed flywheels where magnet placement would be difficult.
You simply wrap the rubber band around the flywheel axle or crank arm and secure the sensor. The companion app detects the sensor automatically. You then enter your wheel circumference in millimeters for accurate speed calculation.
For exercise bikes with exposed flywheels, you can also use older magnet-style sensors. These require you to glue or tape a small magnet to the flywheel. A sensor mounted nearby counts each magnet pass. This method works well but takes more effort to install.
Pros (Accelerometer): Tool-free installation under two minutes. Works on fully enclosed flywheels. No alignment issues. Small and lightweight. Works with any exercise bike instantly.
Cons (Accelerometer): Battery replacement requires removing the sensor. Slightly more expensive than basic magnet sensors. Some models may not fit extremely thick crank arms.
Where to Place Sensors on Different Exercise Bike Types
Exercise bikes come in many shapes and sizes. Your sensor placement depends on your specific bike type. For spin bikes with a heavy exposed flywheel, attach the speed sensor to the flywheel hub using the provided rubber strap.
The accelerometer detects each rotation as the flywheel spins. This is the most common and easiest setup. For upright bikes with enclosed flywheels, you cannot access the flywheel directly. Attach the speed sensor to the crank arm instead.
The sensor will detect crank rotations and the app can convert this to wheel speed if you enter the correct gearing ratio. Many apps let you select a crank-based sensor mode for this exact scenario. For recumbent bikes, access is trickier due to the reclined position.
Mount the speed sensor on the flywheel axle if accessible. Otherwise, crank arm mounting works here too. The cadence sensor always attaches to the left crank arm regardless of bike type. Peel off the adhesive backing or use the rubber strap.
Pros (Flywheel Mount): Most accurate speed calculation. Directly measures wheel rotation. Works out of the box with all cycling apps. Cons (Flywheel Mount): Not possible on fully enclosed bikes. May require removing plastic covers on some models.
Pros (Crank Mount): Universal fit on any bike. Easy access. Quick installation. Cons (Crank Mount): Less accurate speed data unless app supports crank mode. Requires correct gear ratio input for proper conversion.
Top Free and Paid Virtual Cycling Apps That Work With Sensor Upgrades
Several great apps support speed and cadence sensor setups. MyWhoosh stands out as the best free option available. It offers stunning 3D virtual worlds, structured training plans, group rides, and races. The app supports speed sensor mode natively.
You pair your sensor, calibrate once, and enjoy unlimited free access forever. No subscription fees exist. Zwift remains the most popular paid platform with the largest user community. It uses virtual power calculations from speed sensors displayed as zPower.
You can join group rides, complete workouts, and race. The monthly subscription costs around fifteen dollars. Rouvy offers real video routes filmed on actual roads around the world. Your avatar rides over augmented reality overlays on real footage.
Pros (Free Apps): Zero ongoing cost. Full core features without limitations. Great for beginners testing virtual cycling. MyWhoosh matches many paid platform features. Cons (Free Apps): Smaller user communities. Fewer group ride time slots. Limited race events. May have fewer training plan options.
Pros (Paid Apps): Larger communities at all skill levels. More frequent events. Extensive workout libraries. Better customer support and frequent updates.
Step by Step Installation Guide for Your Sensor Upgrade
Follow these simple steps to get your exercise bike ready for virtual cycling. Step one: Unbox your speed sensor and check the contents. Most sensors include the main unit, a rubber strap or zip ties, and a battery pre-installed. Remove the plastic battery tab if present.
Step two: Choose your mounting location. For flywheel mounting, clean the hub area with a dry cloth. Wrap the rubber strap around the hub and hook the sensor into the strap. Pull tight until the sensor sits firmly without wobbling. For crank arm mounting, attach the sensor to the inside of the left crank arm. The flat side should face inward toward the bike frame.
Step three: Install the cadence sensor on the left crank arm if you bought one. Position it along the arm where it will not hit the frame or your shoe during pedaling.
Step four: Place your phone or tablet on a handlebar mount. Cheap universal mounts cost under ten dollars and clamp securely to most handlebar shapes.
Step five: Download your chosen cycling app. Create a free account. Navigate to the sensor pairing screen in the app settings.
Step six: Spin the pedals for a few seconds. Your sensors wake up and appear in the device list. Tap to connect each one. The app remembers them for future sessions.
Step seven: Enter your wheel circumference if the app requires it. Run a short test ride to confirm all data appears correctly on screen. You are now ready to ride.
How to Connect Multiple Sensors and Avoid Bluetooth Pairing Problems
Bluetooth connections can be tricky when you have three or four sensors fighting for attention. Your phone scans for available devices and sometimes connects to the wrong one or drops the connection mid-ride. A few simple practices eliminate most problems.
Always wake up your sensors before opening the cycling app. Spin the pedals for three to five seconds. This activates the sensors from sleep mode and makes them visible to your phone. Do not let other devices like tablets or laptops connect to your sensors.
Turn off Bluetooth on secondary devices before you start. The sensors can only connect to one device at a time. If your laptop grabbed the connection first, your phone will not find them.
Pros (Bluetooth): Built into every modern smartphone and tablet. No extra hardware needed. Simple pairing process. Wide sensor compatibility. Cons (Bluetooth): Limited to one active connection per sensor. Occasional interference from other Bluetooth devices. Shorter range than ANT+.
Pros (ANT+): Allows multiple simultaneous device connections. More stable in crowded environments. Better range. Cons (ANT+): Requires USB dongle for computers. Not supported by phones or tablets without adapters. Slightly more complex setup process.
Essential Accessories That Improve Your Virtual Cycling Experience
Your sensor upgrade unlocks the virtual world. A few key accessories make the experience comfortable and immersive. A sturdy phone or tablet mount sits at the top of the list. Look for mounts with silicone straps that wrap around handlebars of any diameter.
The holder should grip your device firmly without wobbling during sprints. Some mounts offer ball joint adjustments for perfect screen angle. A high velocity fan changes everything about indoor riding comfort.
Your body generates enormous heat during hard efforts. Without airflow, you overheat quickly and performance drops. Position a floor fan at chest height aimed directly at your torso. Remote controlled fans let you adjust speed without interrupting your ride.
Padded cycling shorts protect sensitive areas during longer sessions. Exercise bike seats are rarely comfortable beyond twenty minutes. Quality shorts with dense foam padding extend your comfort significantly. A sweat catcher or bike mat protects your floor from corrosive sweat.
Troubleshooting Common Sensor and App Connection Issues
Problems happen. Most issues have simple fixes that take under a minute to apply.
Sensor not appearing in app: Remove the battery and reinsert it after ten seconds. This forces a hard reset. Spin the pedals again and check the app. Sometimes the sensor pairs to a different app running in the background. Close all fitness apps and try again.
Speed reading shows zero while pedaling: The sensor may have slipped out of position. Check that it sits firmly against the mounting surface. Reposition and tighten the rubber strap. Verify the LED blinks when the flywheel rotates. Replace the battery if the LED stays dark.
Cadence reading jumps erratically: The sensor might be loose or mounted on a curved section of the crank arm. Remount it on a flat section closer to the pedal. Ensure adhesive backing has full contact with the metal surface.
App shows wrong speed or distance: Your wheel circumference setting is incorrect. Measure the flywheel again carefully. Enter the new value into the app profile settings. A difference of even 20 millimeters causes noticeable speed errors over a full ride.
Training Plans and Workouts You Can Follow With Your Upgraded Bike
Your sensor equipped exercise bike now supports serious training. You can follow structured plans that match your fitness goals. Beginner plans build a consistent riding habit. You start with three rides per week lasting twenty to thirty minutes each.
The app guides your effort level using heart rate or perceived exertion. Most beginners complete a six-week base building plan before advancing. Weight loss plans combine longer moderate rides with short high intensity bursts.
You burn more calories during and after the workout due to the afterburn effect. Heart rate zone tracking keeps you in the optimal fat burning range. Endurance building plans focus on long steady rides at low intensity.
You spend hours in zone two building your aerobic engine. These sessions feel easy but produce massive fitness gains over months. Race preparation plans include interval sessions that push your limits. You alternate between maximum efforts and recovery periods.
Frequently Asked Questions
Can I use any exercise bike with virtual cycling sensors?
Yes. Almost every exercise bike works with wireless speed and cadence sensors. Spin bikes with exposed flywheels are the easiest because you can mount the speed sensor directly on the flywheel. Upright bikes and recumbent bikes with enclosed flywheels work too.
Do I need a cadence sensor if I already have a speed sensor?
A cadence sensor is optional but highly recommended. The speed sensor alone gets you into virtual cycling apps and lets you ride. However, you miss critical pedaling data without cadence. Knowing your RPM helps you pedal more efficiently and prevents grinding at low cadences that fatigue your muscles quickly.
Will my phone battery survive a one hour virtual cycling session?
It depends on your phone model and age. Virtual cycling apps use continuous Bluetooth communication, bright screen display, and active graphics rendering. This drains battery faster than typical phone use. Newer phones with healthy batteries usually last through a sixty-minute session with 50 to 60 percent remaining.
Can I race against other people with a sensor-upgraded exercise bike?
Yes, you can race on platforms like Zwift and MyWhoosh with a speed sensor setup. Your virtual power output determines your speed in the digital world. Racers with real power meters may have a slight advantage in accuracy. Some competitive Zwift racing categories restrict riders using virtual power to specific divisions.
What happens if my sensor battery dies during a ride?
Your sensor data drops to zero in the app. Your avatar stops moving in the virtual world. You do not lose the workout data collected before the battery died. Most sensors use standard CR2032 coin batteries that cost a few dollars at any drugstore. Battery life ranges from six to twelve months depending on usage frequency.

Hi, I’m Sarah Hill — the founder and voice behind Heavy Lift Vault. I’m passionate about fitness, strength training, and health technology. I spend my time researching, testing, and reviewing workout equipment and health devices so you don’t have to guess. My goal is to deliver honest, detailed, and trustworthy reviews that help you invest wisely in your fitness journey.