How to Fix a Stuck Hydraulic Piston on a Mini Stepper Machine?
Your mini stepper feels like cement under your feet. The pedals refuse to move. The hydraulic piston sits frozen, and your workout plan just stalled.
This problem hits thousands of home gym users every year, and it can happen to budget steppers and premium models alike.
The good news is simple. A stuck hydraulic piston is one of the most fixable issues on a mini stepper. You do not need a mechanic. You do not need to throw the machine away. You just need a few tools, a little patience, and the right steps.
Key Takeaways
- Most stuck pistons are caused by trapped air, cold thickened oil, or dried internal seals. These issues respond well to gentle pumping, warming, and silicone lubrication, so you rarely need to replace the cylinder right away.
- Never use WD40 directly on a hydraulic cylinder shaft. It strips lubrication and damages rubber seals. Use silicone spray, lithium grease, or 3 in 1 oil on external moving joints instead.
- Always disconnect the cylinder from the pedal arm before testing it by hand. This helps you know if the problem is the piston itself or the frame and bolts around it.
- A piston that leaks oil is a piston that needs replacement. Internal seals cannot be refilled at home on most consumer mini steppers, so a swap is the cleaner fix.
- Tighten every bolt and lubricate every pivot point monthly. A five minute check stops 90 percent of stuck piston cases before they start.
- Store your stepper indoors at room temperature. Cold garages thicken hydraulic fluid and freeze seals, which leads to stiff or stuck pedals.
Why Hydraulic Pistons Get Stuck on Mini Steppers
A mini stepper uses small hydraulic cylinders to create resistance. Inside each cylinder, a piston pushes against thick oil. Over time, that oil can thicken, leak, or trap air bubbles. When this happens, the piston no longer slides freely.
Cold weather is a major trigger. Hydraulic fluid becomes syrupy below 60 degrees Fahrenheit. Dust and dried sweat can also coat the piston shaft, creating friction that locks the rod in place.
Heavy use without lubrication wears down internal seals too. Once a seal hardens or cracks, oil leaks out and air rushes in. The piston then feels stuck, spongy, or unresponsive. Knowing the cause helps you pick the right fix instead of guessing.
Tools and Materials You Will Need
Gathering your supplies before you start saves time and frustration. You will need an adjustable wrench, a set of Allen keys, a Phillips screwdriver, and a soft cloth. These tools handle most consumer steppers from brands like Sunny Health, Stamina, and Niceday.
Pick up silicone spray lubricant, white lithium grease, and 3 in 1 oil too. Avoid WD40 on the piston shaft itself because it damages seals. A small funnel and clean rag help during oil application.
If you suspect leaking fluid, lay an old towel under the stepper. Wear gloves to keep hydraulic oil off your skin. Some users also keep zip ties handy to mark bolt positions before removing them, which makes reassembly faster and cleaner.
Step 1: Inspect the Piston Before You Touch Any Tools
Start with a careful visual check. Flip the stepper on its side and look at the hydraulic cylinder. Search for oil streaks, rust, dents, or loose bolts. A shiny piston rod with no oil film usually means the cylinder has lost fluid.
Press the pedal down slowly by hand. Feel for the exact point where it sticks. Sometimes the issue is not the piston at all but a tight pivot pin or a bent frame bracket.
Wipe the rod clean and watch how it retracts. If it pops back up unevenly or with a jerk, air has entered the system. A piston that does not move at all points to dried seals or a seized internal valve. This inspection saves you from replacing parts that still work.
Step 2: Bleed Air From the Hydraulic Cylinder
Trapped air is the single most common reason a mini stepper piston feels stuck or spongy. Bleeding the cylinder is free and takes about ten minutes. Hold the cylinder upright with the piston rod pointing up.
Push the rod in and out slowly about twenty times. This action moves trapped air toward the top of the cylinder where it can escape past the seal. You may hear small hisses or pops, which is normal.
Pros of bleeding: costs nothing, requires no parts, and often restores full motion in minutes. Cons: it does not work if seals are damaged or fluid has leaked out. If your cylinder still feels locked after bleeding, move to the next fix rather than repeating this step endlessly.
Step 3: Warm Up Thickened Hydraulic Fluid
Cold hydraulic oil behaves like cold honey. Move your stepper to a warm room and let it sit for two hours. Aim for a room temperature between 68 and 75 degrees Fahrenheit. This simple change fixes many winter stiffness complaints.
You can also wrap a warm towel around the cylinder for fifteen minutes. Never use a hair dryer directly on the seals because intense heat melts rubber. Gentle warmth softens the fluid and frees the piston without any disassembly.
Pros: no tools needed, no risk to parts, and very quick. Cons: only solves cold related stiffness, not mechanical failure. If your stepper lives in a cold garage, consider moving it indoors permanently. Storage temperature affects hydraulic life more than most owners realize.
Step 4: Lubricate the External Moving Parts
Many stuck piston complaints are not actually piston problems. The pivot pins, bushings, and pedal arms around the cylinder collect dust and dry out. Spray silicone lubricant on every pivot point and joint near the hydraulic cylinder.
Work the pedals up and down to spread the lubricant. Apply white lithium grease to the bolts that hold the cylinder to the frame. Wipe away any excess so it does not collect more dust later.
Pros of external lubrication: extends machine life, quiets squeaks, and often restores smooth motion. Cons: it does not fix internal piston problems and must be repeated every month or two. Skip WD40 here. It evaporates quickly and leaves the surface drier than before, which can make the problem worse over time.
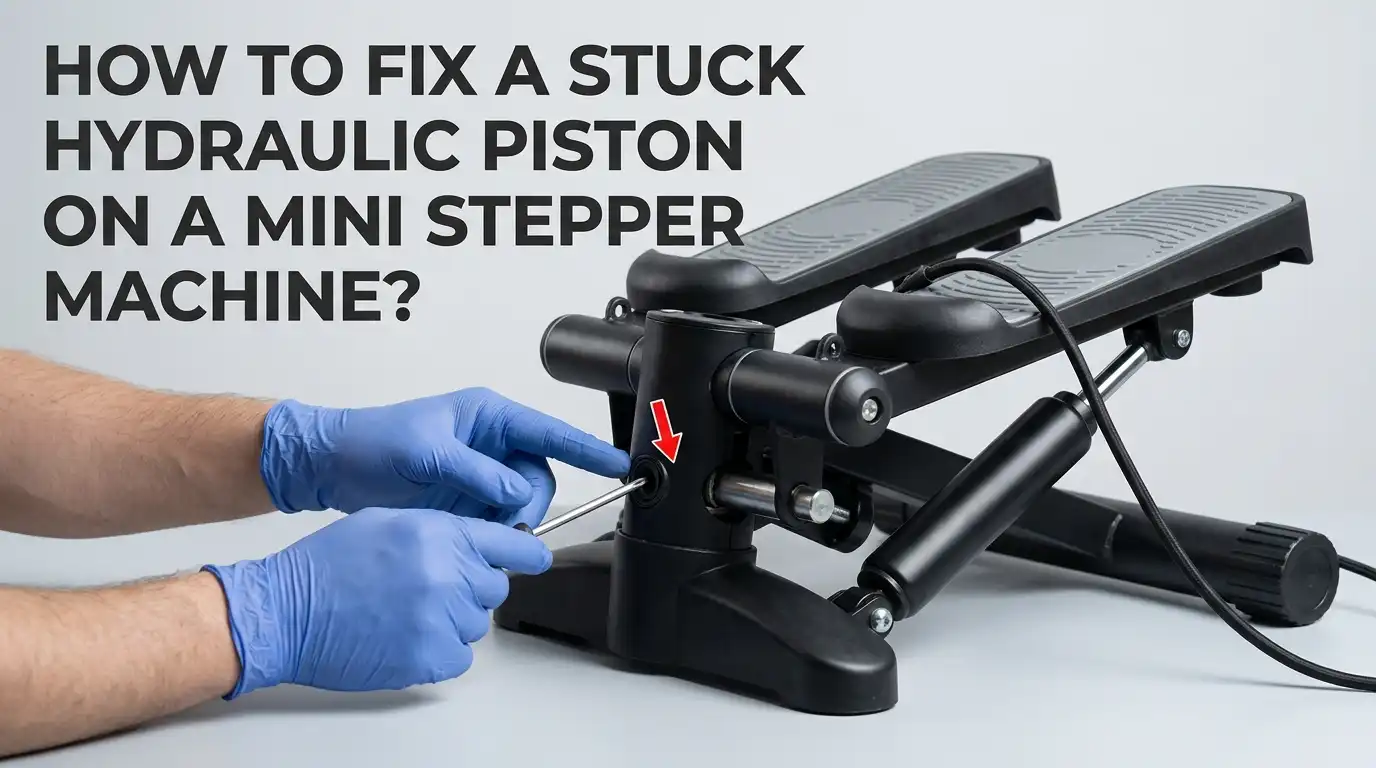
Step 5: Remove and Test the Hydraulic Cylinder by Hand
If lubrication and warming did not help, it is time to isolate the cylinder. Use your Allen wrench to remove the top and bottom bolts that secure it. Hold the nut with an adjustable wrench while you turn the bolt.
Take the cylinder off the machine completely. Stand it upright and push the rod in slowly with both hands. A healthy cylinder offers smooth, even resistance throughout the stroke. A stuck one will refuse to compress or feel gritty.
This hands on test tells you exactly where the problem lives. If the cylinder works fine off the machine, your frame or bolts are too tight. If it stays stuck in your hands, the cylinder itself has failed and needs replacement or deeper service.
Step 6: Try a Penetrating Oil Soak for Light Seizures
Sometimes the piston rod is stuck due to surface corrosion or dried fluid around the seal. A short penetrating oil soak can free it. Apply 3 in 1 oil or a dedicated penetrating fluid around the base of the rod where it meets the cylinder body.
Let it sit for fifteen to thirty minutes. Then gently work the rod in and out. Never force the piston with pliers or a hammer because you can bend the rod and ruin the cylinder for good.
Pros: cheap, low effort, and effective for mild seizures. Cons: will not fix internal seal damage or major leaks. Keep oil away from any rubber boots or dust covers. Wipe the rod fully clean before reinstalling so debris does not get pulled inside the cylinder.
Step 7: Replace the Hydraulic Cylinder When Repair Fails
If your cylinder leaks oil, feels permanently locked, or no longer pushes back at all, replacement is the right move. Most consumer mini stepper cylinders are sealed units that cannot be refilled at home. Contact your machine manufacturer with the model number to order an exact match.
Installation is straightforward. Line up the new cylinder with the original bolt holes, then tighten both ends firmly but not aggressively. Overtightening can crack the mounting brackets.
Pros of replacement: fully restores resistance and feels like a new machine. Cons: costs between fifteen and forty dollars per cylinder, and steppers usually need both replaced at once for balanced resistance. Always replace pistons in pairs so the pedals feel even under your feet.
Step 8: Adjust Resistance After Reinstalling the Piston
Many mini steppers have an adjustment knob or screw that changes resistance. After fixing or replacing the piston, recalibrate this setting. Turn the knob clockwise to increase resistance and counterclockwise to decrease it.
If your stepper has no knob, the resistance is fixed by the cylinder itself. Test the machine at a slow pace first, then gradually pick up speed. The pedals should rise back to the top within one to two seconds of pressure release.
Uneven pedal heights signal that one cylinder is weaker than the other. Swap them side to side to confirm. This step ensures both legs get the same workout and protects your knees from imbalanced loading during exercise.
Step 9: Check for Bent Pedal Arms or Frame Damage
Sometimes the piston is fine but the frame around it is bent. Drop something heavy on the stepper or use it on an uneven floor, and the metal arms can twist slightly. A twisted arm pinches the cylinder and mimics a stuck piston.
Stand the stepper on a flat surface and look down on it from above. Both pedal arms should sit at the same angle. Any visible bend, crack, or gap near the pivot points needs attention.
Light bends can sometimes be straightened with careful hand pressure. Severe damage means the unit is unsafe to use. If your stepper is under warranty, contact the manufacturer rather than attempting frame repair yourself. Bent welds rarely hold up to repeated workout stress.
Step 10: Prevent Future Piston Problems With Regular Care
Prevention beats repair every time. Wipe your stepper down after each workout to remove sweat, which corrodes the piston rod. Lubricate pivot points once a month with silicone spray.
Store the machine indoors in a dry spot away from direct sunlight. Heat and UV light dry out rubber seals faster than normal use does. Keep weight on the pedals within the manufacturer rating to avoid stressing the cylinders.
Every three months, do a full inspection. Tighten all bolts, check for oil drips, and listen for new squeaks. A five minute monthly check stops most stuck piston problems before they start. Treat your mini stepper like any small appliance, and it will run smoothly for years.
When to Call a Professional or Replace the Machine
DIY fixes work for most stuck piston issues, but some problems need expert help. If your stepper is less than a year old and stuck, contact the manufacturer first because warranty coverage may apply. Many brands ship free replacement cylinders without question.
For older machines with multiple failing parts, replacement may cost more than a new stepper. Compare repair costs against a new unit before committing to parts. Budget steppers under one hundred dollars often have non standard cylinders that are hard to source.
If you smell burning, see major oil leaks, or hear cracking sounds during use, stop immediately. These signs point to structural failure rather than simple piston wear. Safety always comes first, and no workout is worth a sudden mechanical breakdown under your feet.
Frequently Asked Questions
Can I use WD40 to fix a stuck mini stepper piston?
No. WD40 is a water displacer, not a true lubricant. It evaporates quickly and can damage the rubber seals inside your hydraulic cylinder. Use silicone spray on external joints and leave the internal piston alone. If the piston itself is failing, replacement is safer than chemical treatments.
How long does a mini stepper hydraulic piston usually last?
Most quality hydraulic cylinders last two to five years with regular home use. Cheaper models may fail in six to twelve months. Storage conditions, body weight, workout frequency, and lubrication habits all affect lifespan. Indoor storage and monthly maintenance can easily double the working life of your pistons.
Why does my mini stepper feel stuck only in the morning?
Cold overnight temperatures thicken the hydraulic oil inside the cylinder. Let the machine warm up to room temperature for thirty minutes before using it. Moving the stepper out of cold rooms like garages or basements solves this problem permanently for most users.
Should I replace one piston or both at the same time?
Always replace both pistons together. A new cylinder offers stronger resistance than a worn one, which makes the pedals feel uneven. Matched pairs give you balanced workouts and protect your knees and hips from twisting under uneven load.
Is it safe to open a hydraulic cylinder and refill it with oil?
For most consumer mini steppers, no. The cylinders are sealed units not designed for refilling. Opening one usually destroys the internal seals and creates a messy oil leak. Replacement is faster, cleaner, and more reliable than a refill attempt.
What kind of oil goes inside a mini stepper hydraulic cylinder?
Manufacturers use lightweight hydraulic fluid similar to ISO 32 grade oil. The exact formula varies by brand and is rarely sold for home use. This is another reason replacement beats refilling for consumer grade machines.

Hi, I’m Sarah Hill — the founder and voice behind Heavy Lift Vault. I’m passionate about fitness, strength training, and health technology. I spend my time researching, testing, and reviewing workout equipment and health devices so you don’t have to guess. My goal is to deliver honest, detailed, and trustworthy reviews that help you invest wisely in your fitness journey.