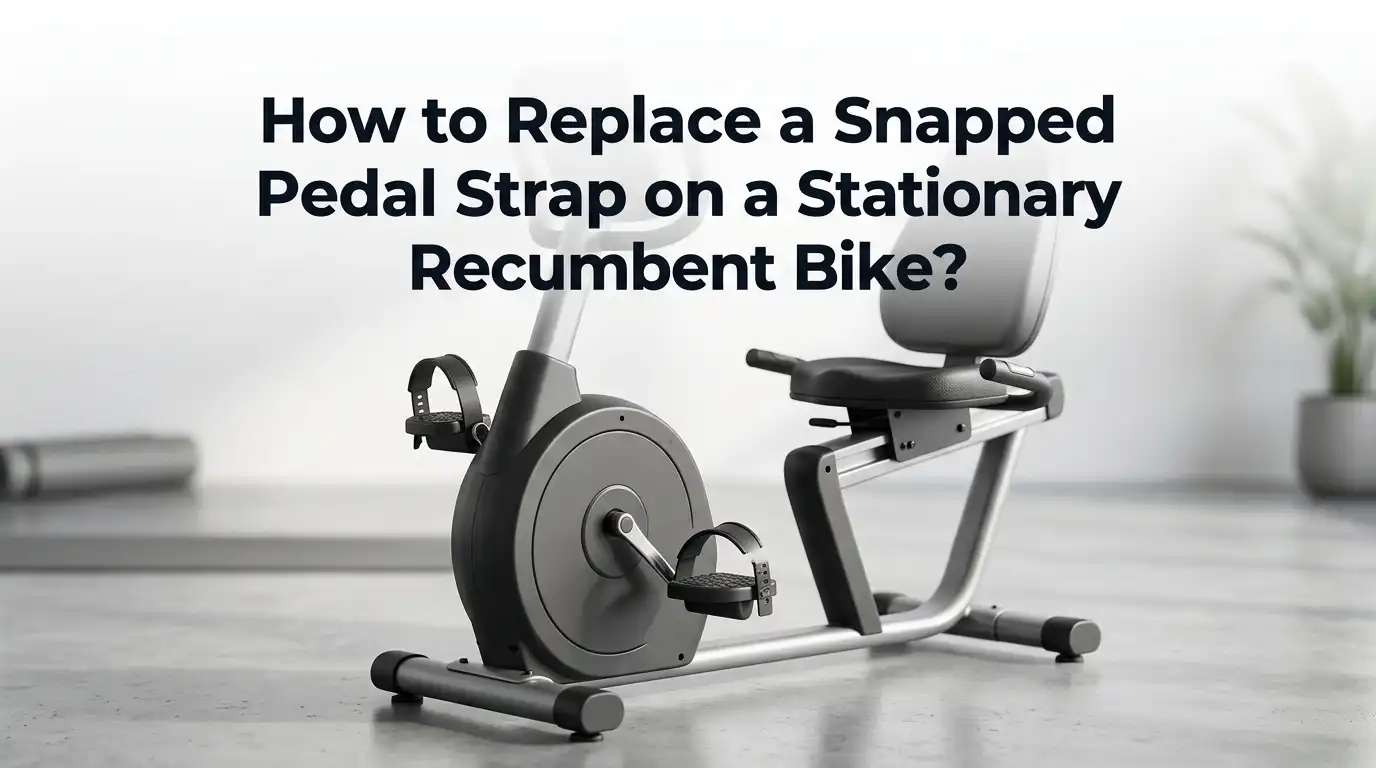
How to Replace a Snapped Pedal Strap on a Stationary Recumbent Bike?
A snapped pedal strap can turn a smooth cardio session into a frustrating mess. Your foot slips, your rhythm breaks, and your workout grinds to a stop. The good news is that you do not need a repair technician for this fix.
Replacing a broken pedal strap on a stationary recumbent bike is a simple DIY job. With a few basic tools and the right strap, you can have your bike running again in under thirty minutes.
This guide walks you through every step, every tool, and every choice you will face. Keep reading to learn how to pick the right strap, remove the old one, install the new one, and avoid future breaks.
Key Takeaways
- Most pedal straps are universal, but you must check the width, length, and mounting holes on your pedal before buying a replacement. Common strap sizes range from 12 to 16 inches long and 1.5 to 2 inches wide.
- You only need basic tools for this repair. A Phillips screwdriver, flathead screwdriver, and small pliers will handle almost every brand of recumbent bike, including Schwinn, NordicTrack, Life Fitness, and Sole.
- Always replace both straps as a pair, even if only one snapped. The other strap is likely worn and will fail soon. This saves time and keeps tension balanced on both pedals.
- Nylon and rubber straps are the most popular materials. Nylon offers strength and a long lifespan. Rubber feels softer but tears faster under heavy use.
- Check the pedal itself for cracks or damage before fitting the new strap. A broken pedal cage can snap a fresh strap within days.
- Tighten the screws firmly but do not overtighten. Overtightening can strip the plastic threads on cheaper pedal housings.
Why Pedal Straps Snap on Recumbent Bikes
Pedal straps break for a few clear reasons. The most common cause is age and material fatigue. Nylon, plastic, and rubber lose strength over time, especially when exposed to sweat, heat, and friction. A strap that flexes thousands of times each month will eventually crack near the buckle or the mounting point.
Heavy users put extra stress on the strap. Pulling too tight, forcing the buckle, or stepping into the pedal at an awkward angle can snap a weak strap instantly.
Cheap factory straps that come with budget recumbent bikes often fail within the first year of regular use. Knowing the cause helps you pick a stronger replacement and use it the right way.
Tools and Materials You Will Need
You do not need a workshop for this repair. Most homes already have the right tools. Gather a Phillips head screwdriver, a flathead screwdriver, and a small pair of needle nose pliers. Keep a clean rag nearby to wipe dust or sweat from the pedal area.
You also need the replacement strap itself. Buy a strap that matches your pedal style. If your pedal has two screw holes, you need a strap with two matching holes. If your pedal has slots, you need a strap that threads through those slots.
A small ruler or tape measure helps you confirm the length and width before you start. Some users keep a drop of light machine oil ready to loosen old, rusty screws.
How to Identify Your Pedal Strap Type
Not every recumbent bike uses the same strap. Look at the broken strap and the pedal carefully before buying a replacement. Most stationary bikes use one of three strap styles.
The screw mount strap attaches with one or two screws on top of the pedal cage. The slot threaded strap weaves through plastic slots on either side of the pedal.
The clip or rivet strap uses a small metal or plastic clip that snaps into the pedal frame. Schwinn, Life Fitness, and Sole bikes usually use screw mount straps.
NordicTrack and ProForm models often use slot threaded designs. Take a clear photo of your pedal before shopping. This helps you match the new strap to the old one without guessing.
Where to Find a Replacement Pedal Strap
You have several options for sourcing a replacement. Universal pedal straps are the easiest and cheapest choice. They fit most stationary bikes and come in pairs. You can find them at sporting goods stores, hardware shops, and online fitness parts retailers.
Brand specific straps are the second option. Many bike makers sell official replacement parts through their websites or customer service lines. These cost more but match the original look and fit perfectly.
The third path is to contact the manufacturer directly. If your bike is still under warranty, you may get free replacement straps shipped to your home. Always check the warranty card or the manufacturer site before paying out of pocket.
Pros and Cons of Strap Sources
Universal straps are affordable and easy to find, but they may not match the original style perfectly. Brand specific straps fit exactly and look clean, but they cost more and ship slower. Manufacturer warranty replacements are free if you qualify, but the process can take weeks and may require proof of purchase.
Step One: Power Off and Position the Bike
Safety always comes first. Unplug the recumbent bike from the wall outlet if it has a power cord. Even though pedals do not use electricity directly, the console and resistance motor still draw power. Pulling the plug protects you from any accidental movement.
Position the bike in an open area with good lighting. Move it away from walls so you can reach both pedals easily. Rotate the pedal you want to work on to the lowest point, near the floor.
This gives you the best angle for removing screws or threading new straps. Place a soft cloth or towel under the pedal to catch any dropped screws or small parts.
Step Two: Remove the Broken Strap
Now you can start the removal. If your strap uses screws, take your Phillips screwdriver and loosen each screw slowly.
Turn counterclockwise and keep the screws in a small dish so you do not lose them. Some screws may be tight from old sweat or rust. A drop of light oil helps loosen stubborn ones.
For slot threaded straps, slide the strap out by gently pulling it through each slot. If the strap is twisted or stuck, use needle nose pliers to grip it and ease it through.
For clip straps, press the clip flat with your flathead screwdriver and slide it out of its housing. Inspect the pedal cage closely for cracks or missing parts before moving on.
Step Three: Clean the Pedal Area
A clean pedal makes the new strap fit better and last longer. Wipe the pedal cage with a damp cloth to remove sweat, dust, and any old strap residue. Pay attention to the screw holes or slot openings, since dirt builds up in these spots over time.
If you see rust or grime in the threads, use a cotton swab dipped in a drop of vinegar or rubbing alcohol. This dissolves buildup without harming the metal. Let the pedal dry fully before installing the new strap.
A clean surface prevents slipping and helps the new strap grip the pedal firmly. This small step adds months to the life of your replacement.
Step Four: Install the New Pedal Strap
Now you can fit the new strap. Line up the holes or slots on the new strap with the matching points on the pedal. Make sure the buckle faces outward, away from the bike frame. This makes it easier to tighten and loosen during your workouts.
For screw mount straps, insert each screw by hand first and turn it a few times. This prevents cross threading. Once both screws are started, tighten them with your screwdriver.
Stop when the strap feels snug but not crushed. For slot threaded straps, weave the new strap through each slot in the same path the old one followed. Pull it tight at both ends and lock the buckle.
Step Five: Test the Strap Tension
Before you hop on for a workout, test the strap. Slide your foot into the pedal and adjust the strap to a comfortable tightness. The strap should hold your foot firmly without pinching or cutting off circulation.
Pedal the bike slowly by hand for a few rotations. Listen for any rattles, watch for slipping, and feel for uneven tension. If the strap feels loose, tighten the buckle one notch.
If it feels too tight, loosen it slightly. Repeat the process on the other pedal. A balanced setup gives you smooth, even resistance on both sides and prevents new wear patterns from forming on one strap.
Pros and Cons of Tight vs Loose Strap Settings
A tight strap gives strong foot control and better pull on the upstroke, but it can numb your toes during long sessions. A loose strap feels more comfortable and lets you slip in and out fast, but it allows your foot to slide during intense pedaling, which can lead to slips or injury.
Common Mistakes to Avoid During Replacement
A few simple errors can ruin a new strap quickly. The first is overtightening the screws. Cheap pedal cages use plastic threads that strip easily.
Stop turning the screw as soon as it grips firmly. The second mistake is installing the strap backward. The buckle must face outward, or you cannot reach it while seated.
Some users skip checking the pedal for cracks, which causes the new strap to snap within days. Others forget to replace both straps at once, leading to uneven wear. Finally, do not use household tape, zip ties, or glue to patch an old strap. These quick fixes fail under pressure and can cause foot injuries during workouts.
How to Extend the Life of Your New Pedal Strap
You can make your new strap last much longer with a little care. Wipe the strap down after every workout to remove sweat and dust. Salt from sweat eats into nylon and rubber over time, weakening the fibers.
Avoid pulling the strap to its maximum length every time you use the bike. Set it once for your shoe size and use the buckle release instead of stretching the strap. Store the bike in a cool, dry room away from direct sunlight.
UV rays fade and weaken strap material fast. Every few months, check the screws and tighten them if they have loosened. These small habits double or even triple the lifespan of your new pedal straps.
When to Call a Professional Instead
Most pedal strap repairs are simple DIY jobs. But some cases need expert help. If the pedal cage itself is cracked or bent, replacing just the strap will not solve the problem. You need a new pedal, and fitting one often requires a special pedal wrench and the right thread direction for your bike.
If the screws are stripped or rusted into the pedal, forcing them out can damage the entire pedal arm. A repair tech has the right tools to extract broken screws safely.
Also, if your bike is still under warranty, contact the manufacturer first. Doing the repair yourself may void the warranty. When in doubt, a quick call to customer support saves time and money in the long run.
Frequently Asked Questions
How much does it cost to replace a pedal strap on a recumbent bike?
A pair of universal pedal straps usually costs between 8 and 25 dollars. Brand specific straps from the manufacturer can cost 20 to 40 dollars per pair. The repair itself is free if you do it at home.
Can I use a regular bicycle pedal strap on a stationary recumbent bike?
Yes, in most cases. Universal bike pedal straps fit both road bikes and stationary bikes. Just confirm that the mounting style and width match your recumbent bike pedals before installing.
How long do pedal straps on a recumbent bike usually last?
A good quality pedal strap lasts between two and five years with regular home use. Heavy daily use or commercial gym use can shorten that lifespan to one or two years.
Should I replace both pedal straps if only one snapped?
Yes. The other strap is likely worn and close to failing. Replacing both at once saves time, keeps tension even, and prevents another sudden break during your next workout.
Can I ride my recumbent bike without pedal straps?
You can, but it is not ideal. Straps hold your feet steady and let you push and pull on each stroke. Without straps, your feet may slip off, especially during fast or high resistance pedaling.
What is the best material for replacement pedal straps?
Heavy duty nylon is the most durable and affordable option. Reinforced rubber feels softer but wears out faster. Leather straps look great but need more care and cost more upfront.

Hi, I’m Sarah Hill — the founder and voice behind Heavy Lift Vault. I’m passionate about fitness, strength training, and health technology. I spend my time researching, testing, and reviewing workout equipment and health devices so you don’t have to guess. My goal is to deliver honest, detailed, and trustworthy reviews that help you invest wisely in your fitness journey.