
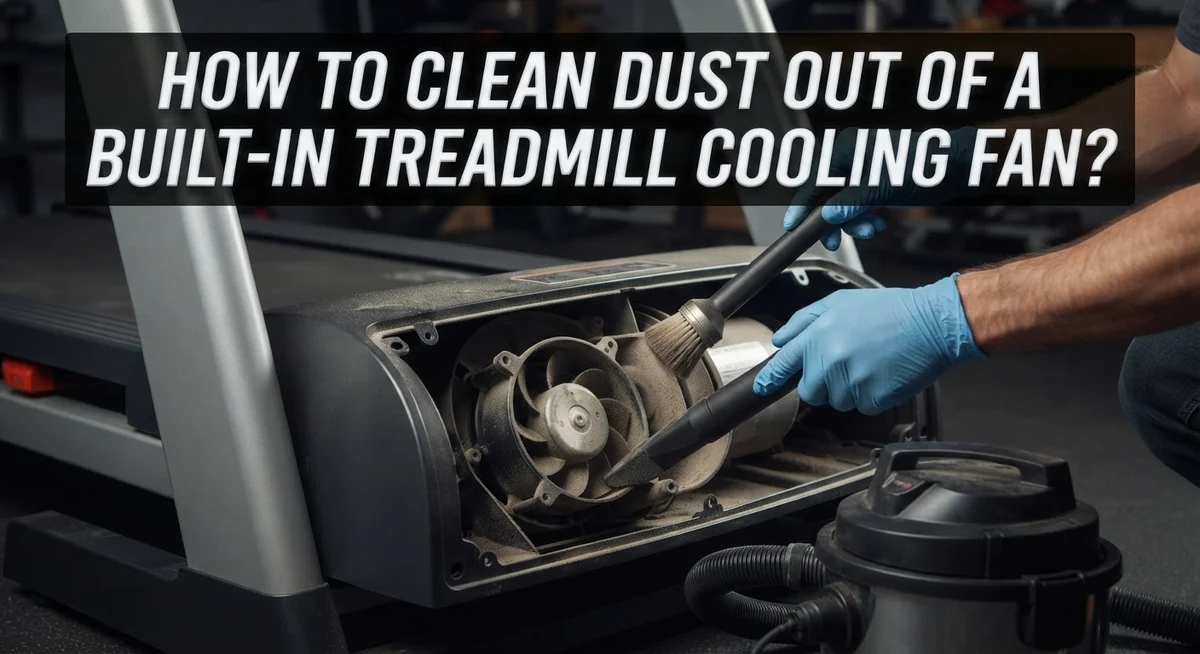
How To Clean Dust Out Of A Built-In Treadmill Cooling Fan?
Your treadmill works hard every time you exercise. Its cooling fan works just as hard, spinning nonstop to keep the motor safe from heat damage.
But over time, dust and debris settle deep into the fan blades. This buildup makes the fan work harder and less efficiently.
Overheating becomes a real risk when dust piles up unchecked. Your treadmill motor can suffer permanent damage if the fan cannot do its job properly.
The good news? You don’t need to be a repair expert to fix this problem. Cleaning a built-in treadmill cooling fan is simple when you know the right steps.
In a Nutshell
- Unplug the treadmill first. Safety comes before any cleaning task. Never skip this step.
- Remove the fan cover carefully. This gives you direct access to the blades. Take your time here.
- Vacuum the loose dust away. A brush attachment helps loosen stubborn buildup. This step tackles the bulk of the mess.
- Scrub with a hot water and vinegar mix. This combo works better than compressed air alone. It breaks down sticky, stuck-on grime.
- Try the pillowcase trick if you skip disassembly. Slip a pillowcase over the blades before cleaning. It catches dust and keeps your space tidy.
- Wipe the exterior clean. A damp cloth handles surface dust easily. This gives your treadmill a fresh, finished look.
- Check blade balance when you finish. Balanced blades mean smoother, quieter operation. This small check prevents bigger problems later.
Why Dust Buildup Damages Your Treadmill’s Cooling Fan
Dust buildup inside your treadmill’s cooling fan creates serious problems over time. When dust settles on the blades, it blocks air circulation and reduces cooling power. Your motor works harder to push air through the dust layer, which raises internal temperatures significantly.
High heat damages electronic components inside your treadmill. The circuit board, wiring, and motor all suffer when temperatures climb above safe levels. A fan clogged with dust cannot cool these parts effectively. Eventually, your treadmill may shut down automatically to prevent permanent damage.
Reduced fan efficiency means your workout feels hotter and more uncomfortable. The machine cannot regulate temperature properly, so you get less airflow during exercise. This makes your treadmill less enjoyable to use and shortens its lifespan.
Dust also creates friction on the fan blades themselves. When blades spin through thick dust layers, they work inefficiently and create vibration. You might notice unusual sounds coming from your treadmill. These vibrations can loosen other components over time.
The cost of replacing a cooling fan or repairing heat damage far exceeds the time spent cleaning. A damaged motor requires professional service and extended downtime. Your treadmill becomes unusable until repairs are complete.
Regular cleaning prevents all these issues. Removing dust buildup keeps your fan operating at full capacity. Your motor stays cool, components last longer, and your workouts remain comfortable. Think of fan cleaning as preventive maintenance that protects your investment.
The good news? Cleaning your fan takes just 30 minutes and uses tools you likely already own. You don’t need special equipment or professional skills. Catching dust early makes the job easier and keeps your treadmill running smoothly for years.
Tools and Supplies You’ll Need Before You Start
Before you start cleaning your treadmill’s cooling fan, gather the right supplies. Having everything ready makes the job faster and safer.
Safety comes first. You need to unplug your treadmill before touching any internal parts. This prevents accidental electrical shock or injury. Keep the power cord unplugged throughout the entire cleaning process.
Vacuum equipment is essential for removing loose dust. A standard household vacuum works well. Use the brush attachment to loosen stubborn dust clinging to the blades. The hose attachment reaches tight spaces where dust hides.
Cleaning liquids help remove stuck on debris. Mix hot water with a few drops of dish soap and a splash of vinegar. This combination breaks down dust better than water alone. Pour the mixture into a spray bottle for easy application. Have clean rags or soft cloths ready to apply the solution and wipe surfaces.
A soft brush speeds up the scrubbing process. An old toothbrush or small cleaning brush works perfectly. Avoid wire brushes that scratch the fan blades.
The pillowcase method requires just one household item. A clean pillowcase slipped over the fan blades catches dust during cleaning. This prevents dust from spreading across your treadmill.
Other useful items include a flashlight to see inside the fan housing clearly. Compressed air works for blowing dust from tight areas, though use it carefully away from the motor.
Optional supplies include safety glasses and gloves. Gloves keep your hands clean while scrubbing. Safety glasses protect your eyes from dust particles.
Gather these items in one spot before starting. This organized approach makes cleaning efficient and prevents interruptions while you work.
Step-by-Step: Safely Accessing the Built-In Fan
Before you touch anything, make sure your treadmill is completely unplugged. This is your most important safety step. A powered fan can cause serious injury, so double check the outlet.
Locate the fan cover on your treadmill. Most models have a plastic or metal cover held by screws or clips. Look at your treadmill’s manual if you can’t find it easily. Take a photo with your phone before removing anything so you remember how it goes back together.
Use a screwdriver to remove the screws holding the cover in place. Keep these screws in a small container so you don’t lose them. Set the cover aside on a clean surface.
Now you can see the fan blades clearly. Look for any visible dust layers or debris stuck to the blades. Check around the motor housing and the edges of the fan cage too.
Before you start scrubbing, use your vacuum with the brush attachment to remove loose dust first. This prevents dust from spreading everywhere. Move slowly and let the vacuum do the work.
Pay special attention to the spaces between the blades. Dust loves to hide there. You may need to angle your vacuum hose to reach these tight spots effectively.
Look at the fan housing walls as well. Dust often builds up on the sides and bottom of the housing. Vacuum these areas thoroughly before moving to wet cleaning.
Once you’ve removed the loose dust, inspect the blades for any remaining buildup. Stuck on dust requires a different approach. This is where your cleaning solution comes in handy.
Removing Dust Without Disassembly: The Pillowcase Method
The pillowcase method is one of the simplest ways to clean your treadmill’s cooling fan without taking it apart. This technique prevents dust from spreading all over your workout area while you clean.
Here’s how it works. Slip a clean pillowcase over the fan blades while they’re still inside the housing. The fabric catches dust as you gently move the pillowcase back and forth over each blade. The pillowcase acts like a dust trap, containing particles that would normally fly into the air.
Start by positioning the pillowcase opening around one blade at a time. Use slow, deliberate movements rather than aggressive scrubbing. This keeps the dust contained and prevents it from escaping into your treadmill’s motor or electronics. Work your way around all the blades systematically.
Once you’ve moved the pillowcase over each blade several times, pull it away slowly. Most of the loose dust will stay trapped inside the fabric. You can then shake the pillowcase outside or over a trash can to dispose of the debris.
This method works best for light to moderate dust buildup. If dust is heavily caked on the blades, you may need to follow up with a damp cloth or brush. The pillowcase method alone removes the bulk of loose particles quickly and safely.
The beauty of this approach is its simplicity. You need no special tools or cleaning solutions. The pillowcase stays reusable, and your treadmill stays protected from unnecessary disassembly. This makes it perfect for regular maintenance between deeper cleanings.
Deep Cleaning Stubborn, Stuck-On Dust and Grime
Stubborn dust and grime stick to fan blades over time. This buildup reduces airflow and causes your treadmill to overheat. Deep cleaning removes these problem areas and restores fan performance.
Start by creating a cleaning solution. Mix hot water with dish soap and vinegar in a spray bottle. The vinegar breaks down stuck-on particles that water alone cannot remove. Spray this mixture directly onto the fan blades and let it sit for 5 to 10 minutes. This soaking time softens hardened dust.
After soaking, use a soft-bristled brush to scrub each blade thoroughly. Work in circular motions to loosen the grime. Pay close attention to blade edges and corners where dust accumulates most. Rinse with a damp cloth to remove soap residue and loosened particles.
For extremely stubborn spots, use a slightly stiffer brush with more pressure. Be careful not to bend or damage the blades during this process. Gentle but firm scrubbing works best here.
Wipe the entire fan housing with a separate damp cloth. Don’t forget the interior walls of the housing, as dust settles there too. Dry everything completely with a clean, lint-free cloth before reassembling.
Check blade balance after cleaning. Spin the fan by hand to ensure it rotates smoothly without wobbling. Uneven rotation means dust remains or blades shifted during cleaning.
Never use compressed air directly on stuck-on dust. This pushes particles toward the motor and electrical components, causing damage. Stick with the wet cleaning method for superior results and safer equipment maintenance.
Using Compressed Air the Right Way
Compressed air is useful for cleaning hard to reach spots inside your treadmill fan. However, you must use it the right way to avoid pushing dust toward sensitive motor parts.
First, position your treadmill so the fan faces away from you. This angle prevents loose particles from flying toward the motor and electrical components. Point the compressed air nozzle at a 45 degree angle to the fan blades.
Use short bursts rather than long continuous streams. Long streams create too much force and send dust deeper into the housing. Short bursts give you better control and reduce the risk of damage.
Keep the nozzle at least 6 inches away from the fan blades. Holding it too close concentrates the air pressure in one spot. This can bend delicate blades or force particles into tight spaces where they get stuck.
Never point compressed air directly at the motor area or motherboard. The motor sits behind or near the fan housing. Dust pushed toward these components causes electrical problems and overheating.
Work in a well ventilated area or outdoors if possible. Compressed air kicks up a cloud of dust that you don’t want breathing in. Wear a mask to protect your lungs from floating particles.
After using compressed air, inspect the fan blades and housing carefully. Look for any dust that got pushed into corners or crevices. Use a damp cloth to wipe away any remaining particles by hand.
Compressed air works best as a finishing step, not your main cleaning method. Combine it with vacuuming and the pillowcase technique for the best results. This multi step approach removes dust safely without risking motor damage.
Mistakes That Can Damage Your Fan or Motor
Cleaning your treadmill’s cooling fan requires care. Mistakes can damage the fan motor or electrical components. Understanding what not to do protects your equipment.
Never disassemble the fan unless absolutely necessary. Many people think they must take the fan apart to clean it properly. This assumption causes damage. The fan has delicate internal parts. Removing the cover is fine, but going beyond that risks breaking connections and sensors.
Avoid pushing dust toward the motor or motherboard. This is the most common mistake people make. When you use compressed air, always angle it away from electrical components. Dust particles travel into the motor housing. Once inside, they cause overheating and electrical shorts. Your motor fails faster when debris reaches these areas.
Don’t soak the entire fan assembly in water. Water damages motors and electrical connections. Use a damp cloth instead of soaking. Apply moisture only to the blades and housing exterior.
Never use excessive pressure on the blades themselves. Blades are lighter than you think. Rough scrubbing or high pressure bends them. Bent blades create vibration and noise. They also reduce cooling efficiency.
Skip using harsh chemicals or abrasive cleaners. These corrode metal parts and damage paint. Simple dish soap and water work well enough.
Don’t forget to unplug the treadmill before starting any cleaning. Working on a plugged-in unit risks electrical shock. It also prevents accidental activation.
After cleaning, check blade balance by spinning the fan gently by hand. Blades should rotate smoothly without wobbling. If they wobble, something got bent during cleaning.
These mistakes are easy to avoid with attention. Proper technique keeps your fan running smoothly for years.
Maintaining a Dust-Free Fan Long-Term
Keeping your treadmill’s cooling fan dust-free requires a simple routine. Dust returns quickly after cleaning, so regular maintenance prevents major problems.
Schedule cleaning every two weeks if you use your treadmill daily. Weekly checks work better if you exercise frequently in dusty environments. This prevents thick layers from building up on the blades and motor housing.
Create a quick inspection habit. Before each workout, look at the fan from the side. You should see the blades clearly without a gray coating. If dust covers more than half the blade surface, cleaning time has arrived.
Use the pillowcase method for quick maintenance. Slip a clean pillowcase over the fan blades while unplugged. Gently shake the case to trap loose dust inside. This fifteen-second task stops dust from spreading across your workout area and keeps particles away from electrical components.
Wipe the fan housing weekly with a dry microfiber cloth. This removes surface dust before it settles deeper into crevices. Pay attention to the intake vents on the fan’s sides and back.
Keep your treadmill in a clean space. Vacuum the area around your machine regularly. Close windows during high pollen seasons if outdoor air enters your home. These simple steps reduce how much dust reaches the fan in the first place.
Store your treadmill with a cover when not in use. This barrier keeps airborne dust away during storage periods. A basic cloth cover works perfectly for this purpose.
Consistency matters more than intensity. Brief weekly cleanings prevent the need for difficult deep cleaning sessions. Your fan runs cooler, your motor lasts longer, and your workouts feel more comfortable.
Final Thoughts
A clean cooling fan keeps your treadmill running smoothly. Dust buildup is the main cause of overheating and motor strain.
You don’t need fancy tools to fix this problem. A vacuum, a soft brush, and some patience go a long way.
Regular care protects your investment. It also helps your treadmill last for many years.
Remember to unplug the unit before you start any cleaning task. This simple step keeps you safe from electrical hazards.
Focus on gentle methods first. Vacuuming and brushing handle most dust without any risk of damage.
Save the water and vinegar solution for stubborn grime. This mixture works well when dust sticks to the blades tightly.
Avoid rushing through the process. Take your time to check every corner of the fan housing.
Small pieces of debris can hide in tight spaces. A careful inspection ensures you catch everything.
Balance checks matter after every cleaning session. A wobbly blade can signal a problem that needs attention.
Spin the blades gently by hand once you finish. This quick test confirms the fan spins freely and evenly.
Building a routine makes this task easier over time. Your future self will thank you for the effort.
Treat this cleaning task as part of your fitness routine. Just like you maintain your body, your machine needs care too.
A dust-free fan means a quieter, cooler treadmill. You get a smoother workout every single time.
In short, simple habits prevent big issues. Cleaning your fan does not have to be a hard chore.
With the right approach, you protect your machine easily. Your treadmill will serve you well for years to come.
Frequently Asked Questions
Can you clean the fan without taking it apart?
Yes, you can clean your treadmill’s cooling fan without disassembling it. The pillowcase method works great for this. Slip a clean pillowcase over the fan blades while the unit is unplugged. This catches dust as you gently rotate the blades by hand. You can also use a spray solution of dish soap, vinegar, and water on a damp cloth to wipe the blades clean.
What is the best way to remove stuck-on dust?
Hot water mixed with vinegar removes stuck dust better than compressed air alone. Mix equal parts vinegar and water, then dip a cloth into the solution. Wipe each blade carefully with the damp cloth. Let the solution sit for a minute on stubborn spots before wiping again. For extra grime, add a drop of dish soap to your vinegar and water mixture.
Can you use compressed air on the fan?
You can use compressed air, but aim it carefully. Direct the air away from the motor and motherboard. Pushing air toward these parts forces dust deeper into the machine. Instead, use compressed air to blow dust away from the motor area. Short bursts work better than long sprays.
How often should you clean the cooling fan?
Clean your fan every two weeks if you use your treadmill daily. Quick weekly wipes with a dry cloth help prevent heavy buildup. Monthly deep cleanings keep the fan running efficiently. Adjust your schedule based on your home’s dust levels and how often you exercise.
What should you check after cleaning?
Spin the fan blades gently by hand after you finish cleaning. The blades should rotate smoothly without wobbling. Listen for any unusual sounds. If the blades feel unbalanced or make noise, stop and inspect for loose debris or damage.

Hi, I’m Sarah Hill — the founder and voice behind Heavy Lift Vault. I’m passionate about fitness, strength training, and health technology. I spend my time researching, testing, and reviewing workout equipment and health devices so you don’t have to guess. My goal is to deliver honest, detailed, and trustworthy reviews that help you invest wisely in your fitness journey.