
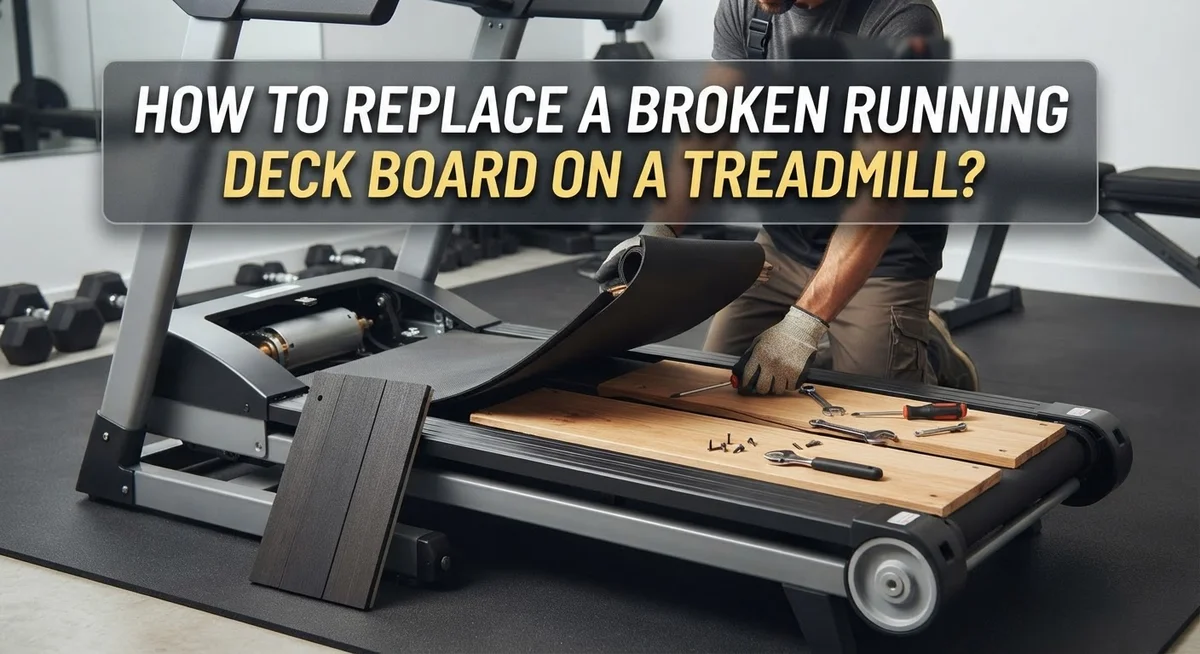
How To Replace A Broken Running Deck Board On A Treadmill?
A cracked treadmill deck can turn your workout into a scary experience. You might hear strange noises. You might feel the belt wobble under your feet.
The good news? You don’t always need a new treadmill. Many broken deck boards can be fixed or swapped out at home.
This guide walks you through the entire process step by step. You’ll learn how to spot the difference between a small crack and a deck that needs full replacement. Small cracks often just need epoxy resin or wood filler.
In a Nutshell
- Small cracks don’t always need a full swap. You can fix them with epoxy resin or a strong wood filler. This saves you time and money.
- Large cracks or breaks mean full deck replacement. There’s no shortcut here. A damaged deck can put you at risk during a run.
- Many decks are double-sided. If yours hasn’t been flipped yet, you might get extra life out of it before buying a new one.
- Safety comes first. Always turn off the power, remove the key, and unplug the cord before touching any parts.
- You don’t need to remove the belt or rollers. Just loosen the belt enough to slide the old deck out and the new one in.
- DIY or professional help both work. If you’re not confident with tools, a professional installation is a solid backup option.
Signs Your Treadmill Deck Is Broken Or Failing
Your treadmill deck shows several warning signs before it fails completely. Knowing these signs helps you catch problems early and decide whether to repair or replace.
Visible cracks or splits are the most obvious indicator. Small surface cracks might appear on top of the deck. Larger cracks run deeper and affect the deck’s structural strength. Look along the entire surface under good lighting to spot these damage areas.
Uneven surface or warping means the deck has started to bend or twist. When you walk on the treadmill, you might notice the belt doesn’t sit flat anymore. The deck may feel slightly raised in certain spots or dipped in others. This uneven surface puts extra stress on your belt and motor.
Strange noises during use often signal deck problems. You might hear creaking, cracking, or popping sounds when you run. These noises typically come from the deck separating or the wood fibers breaking apart underneath the belt.
Increased friction or belt resistance happens when the deck deteriorates. Your belt might move slower or feel harder to push, even after lubrication. This resistance means the deck surface is no longer smooth and even.
Visible wear patterns show where the deck has worn down most. Heavy traffic areas under your feet wear faster than the edges. Deep grooves or worn spots indicate significant material loss.
Sagging or soft spots mean the deck has lost its structural integrity. When you step on the treadmill, certain areas might feel spongy or give way slightly. This is serious and requires immediate attention.
Check your deck regularly during maintenance. Catching these signs early gives you more repair options and prevents safety hazards during workouts.
Repair Or Replace: How To Decide
When your treadmill deck breaks, you face a simple choice: fix it or replace it. The answer depends on how bad the damage is.
Small cracks are fixable. If you see minor cracks in the deck surface, you can repair them yourself. Epoxy resin works well for this job. High impact wood filler is another solid option. These repairs cost less money and take less time than a full replacement. The crack should be smaller than a quarter inch wide for repairs to work effectively.
Large cracks need replacement. If the crack is wide, deep, or spreads across the deck, repair won’t help. A broken or severely damaged deck loses its structural strength. Trying to patch it wastes time and money. You’ll end up replacing it anyway. Full replacement is the only safe option here.
Check if your deck can flip. Many treadmill decks are double sided. If the unused side is still in good condition, you can flip the deck over. This gives you extra years before buying a new one. The tricky part? It’s hard to know if someone already flipped it. Look for wear patterns or ask the previous owner if you bought a used treadmill.
Consider your comfort level. Deck replacement requires removing the motor hood, loosening the belt, and sliding out the old deck. If you feel confident with basic tools, DIY is possible. If you’re unsure about any step, professional installation removes the guesswork. Both options get the job done safely and correctly.
Tools And Materials You’ll Need
Before you start any work on your treadmill, gather the right tools and materials. Having everything ready makes the job faster and safer.
You’ll need a socket set or wrench set to remove bolts that hold the motor hood and side foot rails in place. Most treadmills use standard sizes, so a basic set covers most models. A screwdriver set with both Phillips and flathead options helps with smaller fasteners. Keep both types nearby.
A hex key set (also called Allen wrenches) removes many internal bolts on treadmill frames. Check your treadmill manual to see which sizes you need. You should also have a power drill on hand for faster removal of screws and bolts.
For the deck itself, measure the dimensions carefully before ordering a replacement. You need the exact length, width, and thickness. Write down these measurements so you don’t make mistakes.
Grab a tape measure and pencil to record all dimensions. A level helps ensure your new deck sits flat and even. Uneven decks cause belt tracking problems later.
Work gloves protect your hands from sharp edges on broken deck pieces. Safety glasses shield your eyes from debris during removal. These items matter more than you might think.
Finally, have a clean workspace ready. Remove clutter around your treadmill so you have room to work. Keep bolts and small parts in a container so nothing gets lost.
A manual or service guide for your specific treadmill model is invaluable. It shows exact bolt locations and removal sequences. Many manufacturers provide these online for free download.
Step-By-Step: Removing The Old Deck Board
Start by shutting off your treadmill completely. Find the power button and switch it to the off position. Then remove the safety key and unplug the power cord from the wall outlet. This step keeps you safe from electrical shock or accidental startup.
Next, you’ll remove the motor hood. This plastic or metal cover sits on top of your treadmill frame. Look for bolts or screws holding it in place, usually found at the corners or sides. Use your socket set or hex keys to loosen these fasteners. Lift the hood away carefully and set it aside in your workspace.
Now remove the side foot rails. These are the metal or plastic strips running along each side of the treadmill. They typically attach with several bolts to the main frame. Unscrew all fasteners using your wrench or hex key set. Slide the rails off and place them where they won’t get damaged.
The next part requires patience. You need to loosen the treadmill belt enough to access the deck underneath. Do not remove the belt completely. Instead, locate the adjustment bolts at the front and rear rollers. Loosen these bolts gradually, working from side to side to keep tension even. The belt should become slack enough that you can slide the broken deck out from under it.
Once the belt is loose, you can slide the old deck board out from underneath. Pull it straight toward you without forcing it. The deck should slide out smoothly once the belt has enough slack. Inspect the space where it came from. This is your chance to check for debris, dust, or damage to the rollers before installing your replacement deck.
Step-By-Step: Installing The New Deck Board
Now you’re ready to slide the new deck board into place. Position yourself at one end of the treadmill frame. Carefully align the new deck with the existing belt and roller system underneath.
Slide the new deck board slowly into the frame. Push it straight in without twisting or tilting. The deck should fit snugly between the side rails. If it feels stuck, stop and check the alignment. Don’t force it, as this can damage the edges.
Once the deck is fully inserted, you need to secure it properly. Locate the bolt holes on the deck that align with the frame. Start threading bolts back through these holes by hand first. This prevents cross threading and ensures proper alignment.
Tighten all bolts gradually in a crisscross pattern. Start with one corner, then move to the opposite corner. This distributes pressure evenly across the entire deck. Alternate between sides as you work. Tighten each bolt a little bit at a time rather than fully tightening one bolt completely.
After all bolts are snug, tighten them firmly with your wrench or socket set. The deck should feel solid and not move when you press down on it. Check the belt tension at this point. It should sit evenly on the new deck surface with no gaps or tilting.
Reinstall the side foot rails by reversing the removal process. Line up the mounting holes and insert bolts. Tighten these securely as well. Finally, replace the motor hood and reconnect all cables or wires you disconnected earlier.
Your new deck installation is now complete. Before using the treadmill, verify that everything is secure and the belt tracks straight down the center.
Checking If Your Deck Can Be Flipped Instead
Before you remove your treadmill deck completely, check if flipping it is an option. Many treadmill decks are manufactured with two usable sides. The unused side sits facing downward, protected from wear and tear.
Flipping your deck can extend its life significantly. You avoid the cost and labor of a full replacement. This option works best if your deck damage is on only one side and the other side remains intact.
Here’s how to determine if your deck can flip. First, power down your treadmill completely. Unplug the cord and remove the safety key. Remove the motor hood and side foot rails following the same steps you’d use for replacement.
Loosen the belt enough to access the deck bolts. Slide the deck out partially so you can inspect both sides. Look for existing damage, deep wear patterns, or previous repair attempts on the underside. If the bottom side looks clean and undamaged, flipping is worth considering.
The tricky part is knowing if the deck was already flipped before. Check for wear patterns that suggest previous use. Look for indentations from the belt, discoloration, or compression marks. If the bottom side shows these signs, someone already flipped it once.
Many manufacturers mark their decks to show which side is original. Check for labels, stamps, or markings along the edges. These indicators tell you whether flipping remains an option.
If the underside looks pristine and unmarked, flipping works great. Slide the deck back out completely, flip it over, and reinstall it facing upward. This gives you a fresh running surface without replacement costs. If both sides show damage or previous use, full replacement becomes necessary.
Common Mistakes To Avoid During Replacement
When replacing a treadmill deck board, several mistakes can derail your project or damage your machine. Understanding these pitfalls helps you complete the job successfully.
Don’t ignore crack size before deciding on repair versus replacement. Small cracks under two inches can often be filled with epoxy resin or wood filler. Large cracks or breaks require a full deck replacement. Attempting to repair extensive damage wastes time and money.
Skipping the deck flip check is a costly error. Many decks feature two usable sides. Before removing your entire deck, inspect the underside carefully. If it appears fresh and unmarked, flipping extends your deck’s life without full replacement. This simple step saves significant effort.
Never remove the belt and rollers during deck replacement. This creates unnecessary work and risks misalignment later. Instead, loosen the belt just enough to access the deck bolts. You can slide the deck out without complete belt removal.
Don’t rush the bolt tightening process. Tighten bolts gradually in a crisscross pattern, not all the way on one side first. This ensures even pressure and prevents warping. Uneven tightening causes deck misalignment and belt problems.
Avoid working on a plugged in treadmill. Always unplug the power cord completely and remove the safety key. Electricity poses serious hazards during deck work.
Don’t forget to inspect the deck bolts themselves. Stripped or damaged bolts won’t hold your new deck securely. Replace any worn bolts before installing your new deck board.
Finally, resist the urge to skip lubrication maintenance after installation. Proper belt lubrication prevents premature deck damage and extends replacement intervals significantly.
Maintenance Tips To Extend Deck Life
Your treadmill deck works hard every single day. Proper maintenance keeps it running smoothly and extends its life significantly. Here are practical steps to protect your investment.
Lubrication is your first line of defense. Most decks need regular lubrication to reduce friction between the belt and the running surface. Check your manufacturer’s guide for lubrication schedules. Apply lubricant evenly across the entire deck surface. A well lubricated deck experiences less wear and tear over time.
Keep the deck clean and dry. Sweat and moisture damage the deck material quickly. Wipe down your treadmill after each workout. Remove dust and debris from underneath the belt monthly. Moisture creates rot and weakens the structural integrity of the deck.
Monitor belt tension regularly. A belt that’s too tight puts excessive pressure on the deck. A loose belt causes uneven wear patterns. Check tension monthly by pressing on the belt midway between rollers. The belt should have about half an inch of give.
Inspect for early warning signs. Small cracks appear before major damage happens. Look for discoloration, soft spots, or visible splits. Catch problems early when repairs are still possible. Address small issues immediately rather than waiting for complete failure.
Distribute your weight evenly. Running off center stresses one side of the deck more than the other. Stay centered on the belt during workouts. This simple habit prevents uneven degradation.
Maintain consistent usage patterns. Extreme changes in workout intensity or frequency stress the deck. Build up gradually when increasing your routine. Consistency helps the deck age evenly.
Regular maintenance saves money and keeps your treadmill performing at its best.
Final Thoughts
Replacing a broken running deck board feels like a big job. But you now have the steps to handle it with confidence.
Safety comes first in every repair. Always unplug your treadmill before you start any work.
Take time to inspect your deck carefully. This helps you decide between a simple repair and a full replacement.
Small cracks often just need filler or epoxy. Large cracks or complete breaks mean you need a new deck board.
Don’t forget to check if your deck can flip. This simple trick can save you money and extend your treadmill’s life.
Remember the basic process. Remove the motor hood, take off the side rails, then loosen the belt to access the deck.
You never need to remove the belt or rollers completely. This makes the whole job much simpler than it sounds.
Take your time with each step. Rushing leads to stripped bolts or misaligned decks.
Tighten your bolts evenly using a crisscross pattern. This keeps your new deck sitting flat and secure.
If your project feels too complex, calling a professional is always an option. There’s no shame in getting expert help for tricky repairs.
Once your new deck is installed, don’t stop there. Regular maintenance keeps your fresh deck running smoothly for years.
Lubricate your belt often. Keep the deck area clean and dry after every workout.
Check your belt tension periodically. This prevents unnecessary strain on your brand new deck board.
With proper care, your treadmill deck should last a long time. You’ve saved money and gained valuable DIY skills today.
Your treadmill is ready for many more miles ahead!
Frequently Asked Questions
How do I know if my deck needs repair or full replacement?
Check the crack size and depth first. Small cracks under two inches often respond well to epoxy resin or wood filler. Larger cracks that go deep into the deck material require a complete replacement.
Look at the crack location too. Cracks near the edges or under high stress areas tend to spread quickly. If the damage affects the deck’s structural support, replacement is your safest choice.
Can I flip my deck to avoid replacement?
Many treadmill decks feature two usable sides. You can flip the deck over to use the unused side, which extends your equipment’s life significantly.
However, determining if your deck was already flipped is difficult. Check your treadmill’s manual or contact the manufacturer for guidance. If you’re unsure, assume one side has been used and proceed with caution.
Do I need to remove the belt and rollers to replace the deck?
No, you don’t need to remove them. Loosen the belt enough to unscrew the deck bolts, then slide the deck out carefully. This approach saves time and reduces the risk of misalignment later.
Keep the belt and rollers in their original positions. This makes reinstallation much simpler and more accurate.
What’s the first step before starting any deck work?
Safety comes first. Shut off the treadmill completely and remove the safety key. Unplug the power cord from the wall outlet to eliminate electrical hazards.
Never work on a plugged in machine, even if it’s powered off. This prevents accidental startup during your repair work.

Hi, I’m Sarah Hill — the founder and voice behind Heavy Lift Vault. I’m passionate about fitness, strength training, and health technology. I spend my time researching, testing, and reviewing workout equipment and health devices so you don’t have to guess. My goal is to deliver honest, detailed, and trustworthy reviews that help you invest wisely in your fitness journey.