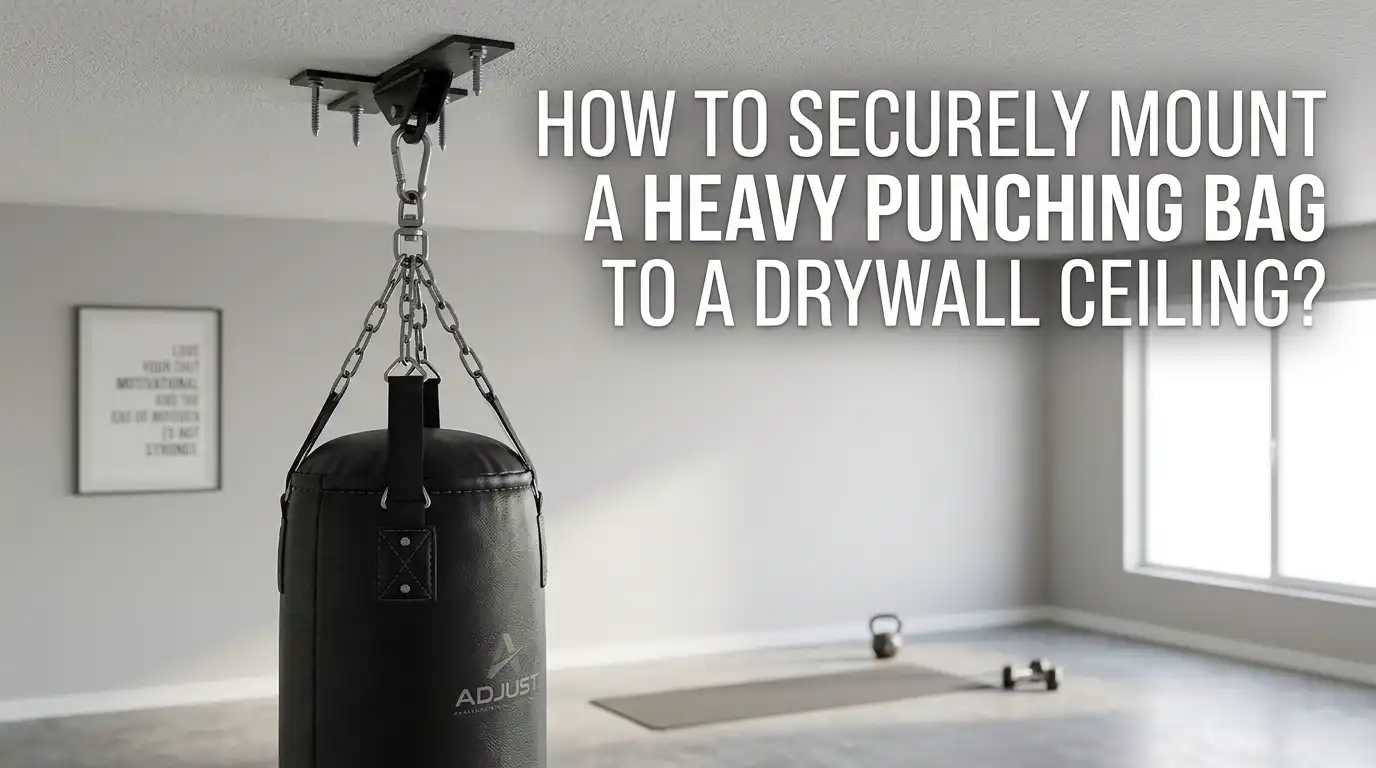
How to Securely Mount a Heavy Punching Bag to a Drywall Ceiling?
Hanging a heavy punching bag from a drywall ceiling sounds simple. But one wrong move can crack your ceiling, drop your bag, or even cause injury.
Drywall alone cannot hold the swinging force of a 70 to 100 pound bag. You need to reach the wooden joists hidden above the drywall.
This guide walks you through every step. You will learn how to find joists, pick the right hardware, and install a bag that stays put through years of training.
In a Nutshell:
- Never trust drywall alone. Drywall holds only a few pounds. Your bag must anchor into solid wood joists or a steel beam above the drywall layer.
- Find the joists first. Use a stud finder to locate ceiling joists. Mark two or three side by side, since the dynamic load of a punch can triple the static weight.
- Use a mounting plate or board. A 2×8 or 2×10 hardwood board lag bolted across three joists spreads the load and prevents wood splitting under stress.
- Pick the right hardware. Use half inch lag bolts at least 3 inches long, paired with a heavy duty swivel hook rated for at least three times your bag weight.
- Add a spring or swivel. A heavy duty spring absorbs shock and protects both your ceiling and your shoulders from harsh recoil.
- Test before you train. Hang the bag, pull down hard, then swing it gently before throwing full power punches. Inspect monthly for loose bolts or cracks.
Why Drywall Alone Cannot Hold a Heavy Bag
Drywall is a thin sheet of gypsum sandwiched between paper. It is great for smooth walls but terrible for heavy loads. A single drywall anchor can hold maybe 5 to 20 pounds of static weight. A swinging 80 pound bag creates dynamic forces of 200 pounds or more with each punch.
Toggle bolts in drywall fail quickly under this stress. You will see cracks form around the anchor first. Then the paper layer tears. Finally, the whole chunk drops, often pulling a wide section of ceiling with it.
This is why every safe install must reach the wooden joists hidden behind the drywall. The drywall is just a cosmetic layer. The structure that holds weight sits behind it.
Tools and Materials You Will Need
Gather everything before you start. Stopping mid project to run to the hardware store creates frustration and risks mistakes.
You will need a stud finder with deep scan mode, a power drill, a half inch socket wrench, a pencil, a tape measure, and safety glasses. For materials, get half inch by 3 inch lag bolts, large washers, and a heavy duty ceiling mount or eye bolt rated for at least 600 pounds.
Many people also add a 2×8 hardwood mounting board, a heavy duty steel spring, a swivel hook, and chains. Pick chains rated for triple your bag weight. Pine works for the board, but oak or maple lasts longer under repeated strain.
Keep a flashlight handy too. Looking into the ceiling cavity helps you confirm joist direction before drilling.
How to Locate Ceiling Joists Correctly
Joists are the wooden beams that support your ceiling and the floor above. Most homes have joists spaced 16 inches apart, though some older builds use 24 inch spacing. Joists usually run perpendicular to the longest wall in the room.
Turn on your stud finder and slide it slowly across the ceiling. Mark the edges of each joist you find. Then mark the center point. Confirm your reading by tapping the ceiling. A solid thud means joist. A hollow sound means empty drywall.
For extra certainty, drill a tiny pilot hole with a thin finishing nail. If it hits wood within an inch, you found a joist. If it pushes through easily, you missed. Mark at least two joists side by side, since a single joist is rarely enough for a heavy bag.
Method 1: Mounting Directly to a Single Joist
This is the fastest method but works only for lighter bags under 70 pounds. You drill a heavy duty eye bolt or ceiling hook directly into the center of one joist.
Drill a pilot hole slightly smaller than your lag bolt diameter. A 5/16 inch pilot for a half inch bolt works well. Then twist the lag bolt in using your socket wrench until the eye sits flush against the drywall.
Pros: Quick install, minimal hardware, looks clean and discreet. Good for speed bags or light training bags.
Cons: Limited weight capacity, all stress falls on one joist, wood can split over time, not safe for power punching or kicking. You also have less freedom in choosing the exact spot. The bolt must hit the joist center exactly.
Method 2: Mounting Plate Across Multiple Joists
This is the gold standard for heavy bags 80 pounds and up. You attach a thick board across two or three joists, then mount your hook to the board.
Cut a 2×8 or 2×10 hardwood plank about 24 to 36 inches long. Hold it flat against the ceiling with the long edge crossing your marked joists. Drill pilot holes through the board into each joist. Then secure with half inch lag bolts and washers, using at least two bolts per joist.
Once the board is rock solid, mount your ceiling hook in the center of the board. This spreads the bag weight across three joists instead of one. The shock load gets distributed, and no single piece of wood takes too much abuse.
Pros: Handles bags up to 150 pounds, distributes force evenly, prevents joist splitting, lasts for decades.
Cons: More work, visible board on ceiling, requires precise drilling and careful measurements.
Method 3: Using a Pre-Made Ceiling Mount Bracket
Pre-made brackets are steel plates designed for hanging heavy bags. They come with bolt holes already drilled and instructions for installation.
You position the bracket across the joists, drill pilot holes through the bracket holes, and lag bolt it in place. Most brackets include a built in spring or swivel attachment. This saves you from buying extra parts.
Pros: Professional look, engineered for boxing loads, often includes shock absorbing springs, weight ratings are clearly listed.
Cons: Costs more than DIY methods, fewer customization options, some brackets need two adjacent joists which may not match your ceiling layout. Always check the rated capacity before buying. A bracket rated for 100 pounds works for a 70 pound bag, but not for a 120 pound bag with full power strikes.
Adding a Spring and Swivel for Shock Absorption
A spring between the ceiling mount and the bag changes everything. It absorbs the snap of each punch and cuts the dynamic force in half.
Without a spring, your ceiling takes the full impact every time you hit the bag. With one, the spring stretches and rebounds, softening the load on the joists. Look for heavy duty steel springs rated for 200 pounds or more.
A swivel sits between the spring and the chains. It lets the bag spin freely without twisting the chains. This stops chain wear and keeps your bag moving naturally.
Pros: Protects ceiling, reduces noise, easier on joints, smoother bag motion, extends hardware life.
Cons: Lowers the bag slightly so you need higher ceiling clearance, adds cost, springs can squeak and need occasional lubrication.
Step by Step Installation Walkthrough
Now we tie it all together. Start by clearing the floor below and laying down a drop cloth to catch dust.
First, locate and mark your joists. Second, hold your mounting board to the ceiling and pencil the bolt locations. Third, drill 5/16 inch pilot holes through the board and into the joists. Fourth, lift the board back into place and drive in your lag bolts with washers.
Fifth, attach the ceiling hook or eye bolt to the center of the board. Sixth, connect your spring, then the swivel, then the chains. Finally, lift the bag and hook the chains onto the swivel.
Tighten everything with a wrench, not just by hand. Loose bolts work themselves out faster under repeated impact. Double check every connection before you punch.
Safety Testing Before Your First Workout
Never throw a full power punch at a freshly mounted bag. Test it first to catch any weak points.
Grab the chains and pull straight down with your full body weight. Hold for 30 seconds. If nothing shifts and no cracks appear, give the bag a gentle push. Watch the ceiling around the mount as the bag swings.
Next, throw a few light jabs at 30 percent power. Inspect the mounting board and bolts. Then try moderate strikes. If everything stays tight after five minutes of medium work, you can train at full intensity.
Mark your calendar to inspect the mount once a month. Look for hairline cracks in drywall, rust on chains, or loose lag bolts. Tighten anything that moved. A quick check prevents big problems later.
What to Do If You Cannot Find Joists or Have a Concrete Ceiling
Some homes have steel beams, concrete slabs, or unusual ceiling structures. If your stud finder reads nothing or your ceiling sounds solid throughout, stop and reconsider.
For concrete ceilings, you need wedge anchors rated for shear and pull out loads. Drill with a hammer drill and masonry bit. Use anchors rated for at least 500 pounds.
For ceilings you cannot identify, hire a contractor for a quick inspection. The fee is small compared to repairing a collapsed ceiling. They can also tell you if your joists are strong enough for the load.
If neither option works, switch to a heavy bag stand or a wall mount bracket attached to wall studs. These bypass the ceiling entirely and still give you a solid training setup.
Heavy Bag Stand as an Alternative
If your ceiling looks risky, a heavy bag stand solves the problem without any drilling. These are free standing metal frames that hold the bag from above.
Quality stands weigh 100 to 200 pounds and often have arms for adding speed bags. You can move them between rooms and they leave your ceiling untouched. Most cost about the same as a good mounting kit plus your time.
Pros: No ceiling damage, portable, works in rented homes, no joist hunting, easy assembly.
Cons: Takes floor space, can wobble or tip under hard kicks if not weighted properly, less stable than a true ceiling mount, some models squeak or rattle during workouts. Always add sandbags or weight plates to the base for stability.
Frequently Asked Questions
Can I hang a punching bag from drywall using only toggle bolts?
No. Toggle bolts in drywall fail under the dynamic load of a heavy bag. You will see cracks and eventually a complete failure. Always anchor into wooden joists or a steel mounting plate behind the drywall.
How much weight can a ceiling joist actually hold?
A single 2×8 joist can support roughly 300 to 400 pounds of static weight. But dynamic loads from punching multiply this. Spreading the load across two or three joists with a mounting board is the safest approach.
Do I really need a spring between the ceiling and the bag?
You do not need one, but it helps a lot. A spring cuts the impact force on your ceiling by about half and reduces noise. Your joints will also thank you for the softer bag rebound.
How high should I mount my heavy bag?
Most boxers like the bag bottom at about waist or hip height when hanging. For kickboxing, mount it slightly higher so you can target the upper body and head zones comfortably.
What size lag bolts work best for ceiling mounts?
Use half inch diameter lag bolts at least 3 inches long. They penetrate deep into the joist while leaving enough thread to grip strongly. Always use large washers under the bolt heads.
Can I install a heavy bag mount alone or do I need help?
You can do it alone, but a helper makes the job much easier. One person holds the mounting board while the other drills and bolts. Working alone, you can use a long stick or temporary screws to hold the board in place.
What if my ceiling cracks after installation?
Stop using the bag immediately. Small hairline cracks may be cosmetic, but spreading cracks mean structural failure. Remove the bag, inspect the joists, and consider adding a larger mounting plate or moving to a stand.

Hi, I’m Sarah Hill — the founder and voice behind Heavy Lift Vault. I’m passionate about fitness, strength training, and health technology. I spend my time researching, testing, and reviewing workout equipment and health devices so you don’t have to guess. My goal is to deliver honest, detailed, and trustworthy reviews that help you invest wisely in your fitness journey.