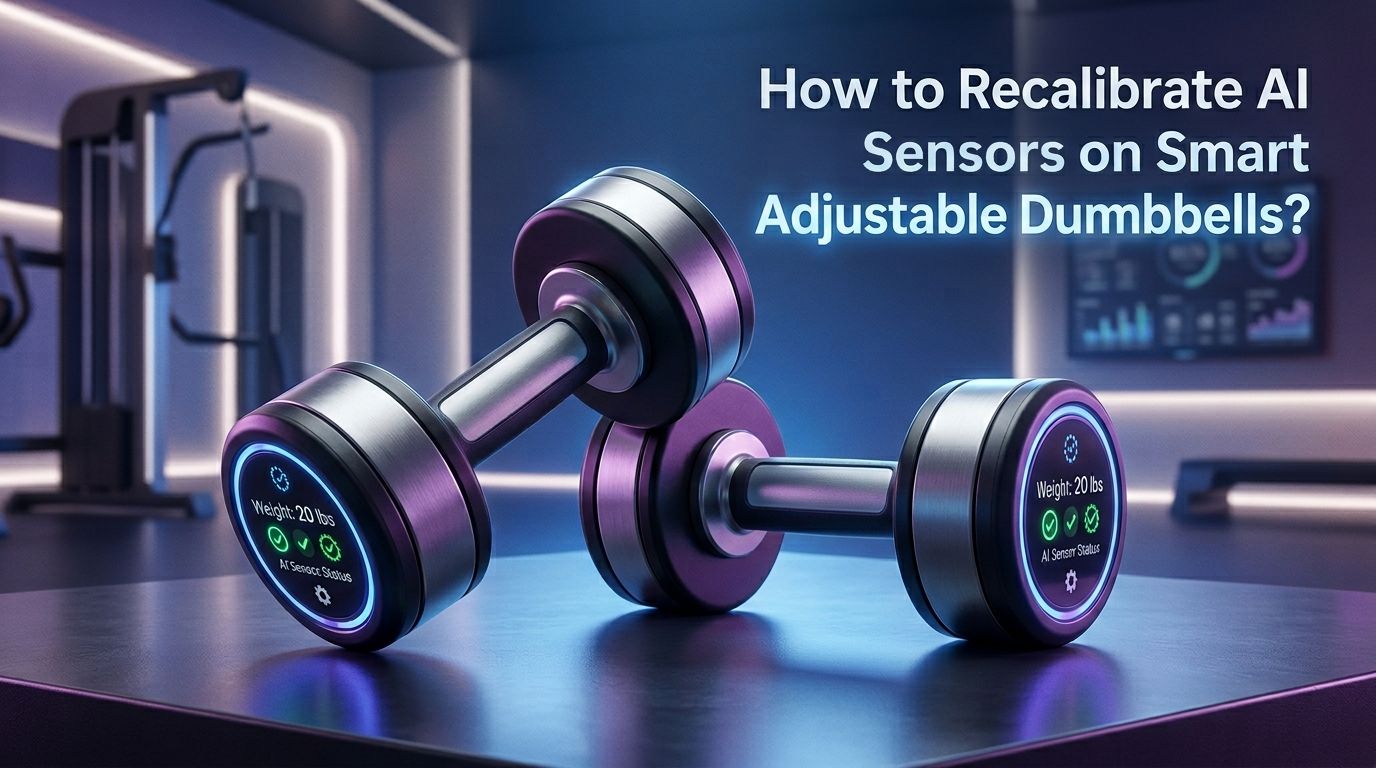
How to Recalibrate AI Sensors on Smart Adjustable Dumbbells?
Smart adjustable dumbbells have changed home fitness forever. These AI powered weights use accelerometers, gyroscopes, and load sensors to track your reps, adjust resistance, and coach your form in real time.
But what happens when the sensors stop reading correctly? Your rep counts go haywire. The auto weight adjustment picks the wrong load. The companion app shows data that makes no sense.
This is a real problem for anyone who relies on accurate data to progress in their training. A miscalibrated sensor can lead to incorrect weight selections, missed reps, and even safety risks during your workout.
Key Takeaways
- Most sensor errors in smart dumbbells come from three sources: low battery, firmware bugs, or physical misalignment of internal components. Checking these three things first will solve the majority of calibration problems you encounter.
- A factory reset is the fastest recalibration method for most smart dumbbell brands. This clears stored sensor data and forces the device to rebuild its baseline readings from scratch. Always try this before more advanced fixes.
- Firmware updates often include sensor calibration patches. Manufacturers regularly release software updates that improve how the AI interprets sensor data. Keeping your app and dumbbell firmware current prevents many accuracy problems before they start.
- Environmental factors matter more than you think. Extreme temperatures, high humidity, electromagnetic interference from nearby electronics, and even the surface you place your dumbbells on can cause sensor drift and inaccurate readings.
- The accelerometer and gyroscope inside your dumbbell need a stable reference point to calibrate. This means placing the dumbbell on a flat, level, vibration free surface during any reset or calibration process is critical for success.
- If software fixes fail, the issue may be hardware related. Loose internal wiring, damaged load cells, or corroded sensor contacts require professional repair or a warranty claim. Do not attempt to open the dumbbell housing unless the manufacturer provides disassembly instructions.
Understanding the AI Sensors Inside Smart Dumbbells
Smart adjustable dumbbells rely on a combination of sensor types to deliver their intelligent features. The most common sensors include accelerometers, gyroscopes, and load cells. Accelerometers measure linear motion and detect how fast you move the weight up and down. Gyroscopes track rotational movement and help the AI understand your hand orientation and exercise form.
Load cells or strain gauge sensors detect the actual weight being lifted. Some models, like those with auto weight detection, use magnetic position sensors to confirm which weight plates are engaged. The AI software fuses data from all these sensors together to produce accurate rep counts, velocity measurements, and form corrections.
Understanding what each sensor does helps you diagnose problems faster. If your rep count is wrong, the accelerometer or gyroscope is likely the issue. If the displayed weight is incorrect, the load cell or magnetic position sensor needs attention.
Common Signs Your Dumbbell Sensors Need Recalibration
Knowing the symptoms of a miscalibrated sensor saves you time and frustration. The most obvious sign is inaccurate rep counting. If your app says you did 15 reps when you clearly did 10, the motion sensors are drifting from their baseline.
Another common sign is incorrect weight display. Your dumbbell might show 25 pounds on the screen or app when you have it set to 30 pounds. This points to a load cell or position sensor error. Erratic haptic feedback is another red flag. If vibration cues come at random times instead of matching your tempo, the gyroscope data is likely corrupted.
You might also notice delayed response times. The AI should react to your movements in real time. A lag of more than half a second between your motion and the app’s response suggests the sensor fusion algorithm is struggling with bad input data. Finally, if the companion app throws frequent error codes or disconnects mid workout, sensor communication may be breaking down.
Step 1: Check Battery and Power Levels First
Before you start any calibration procedure, check the battery or charge level of your smart dumbbells. Low power is the single most common cause of sensor inaccuracy. Sensors require consistent voltage to produce reliable readings. When the battery drops below 20%, sensor output can become erratic and unstable.
Plug your dumbbells into their charging base and let them reach a full charge. Many users on forums report that their calibration issues vanished completely after a full recharge cycle. This simple step solves roughly 30% to 40% of all sensor complaints.
Pros of checking power first: It is free, takes no technical skill, and resolves a large percentage of issues.
Cons: It does not fix hardware damage or firmware bugs, and charging takes time before you can verify if it worked.
Make sure the charging contacts on both the dumbbell and the base are clean. Dust, sweat residue, and corrosion on charging pins can prevent a full charge even when the device appears to be connected.
Step 2: Perform a Soft Reset Through the Companion App
Most smart dumbbell systems have a soft reset option inside their companion app. This process clears temporary sensor data without erasing your workout history or user profile. Open your app, go to device settings, and look for options labeled “Recalibrate,” “Reset Sensors,” or “Sync Device.”
Place the dumbbell on a flat, stable surface before you start the reset. The sensors need a motionless reference point to establish their zero position. Do not hold the dumbbell in your hand during this process. Any micro movements from your body will corrupt the baseline reading.
Follow the on screen instructions. Most apps will ask you to leave the dumbbell still for 10 to 30 seconds while the accelerometer and gyroscope reset. Some apps also ask you to rotate the dumbbell to specific positions to calibrate all three axes of motion.
Pros of soft reset: Quick, easy, preserves your data, and works for most drift related issues.
Cons: May not fix deep firmware glitches or hardware problems. Requires a Bluetooth connection that sometimes fails on its own.
Step 3: Execute a Full Factory Reset on the Hardware
When a soft reset does not solve the problem, a full factory reset is the next step. This erases all stored data on the dumbbell itself and forces the sensors to recalibrate from a blank state. The method varies by brand, but most smart dumbbells have a small reset button on the base or underside of the handle.
For many models, you press and hold this button for 5 to 10 seconds until an LED light blinks rapidly. Some brands require you to press a combination of buttons. Always check your specific product manual for exact instructions. After the reset, you will need to re pair the dumbbell with your app via Bluetooth and set up your user profile again.
Place the dumbbell on a perfectly level surface during the initial pairing process. The first few seconds after a factory reset are when the sensors establish their reference orientation. A tilted or uneven surface will bake an error into every future reading.
Pros of factory reset: Fixes most software and calibration issues completely. Gives you a clean start.
Cons: Erases all stored workout data on the device. You must re pair and set up profiles from scratch. Does not fix physical sensor damage.
Step 4: Update Firmware and App Software
Outdated firmware is a hidden cause of many sensor problems. Manufacturers push firmware updates that include calibration algorithm improvements, bug fixes, and new sensor fusion logic. If you skip these updates, your dumbbell runs on old code that may misinterpret sensor data.
Open your companion app and check for available updates. Most apps display a notification badge when new firmware is ready. Connect your dumbbell to its charger during firmware updates. A power loss mid update can brick the device or corrupt its sensor calibration files permanently.
After the update installs, perform a soft reset to let the new firmware establish fresh sensor baselines. This two step process of updating then resetting gives you the best chance of restoring full accuracy.
Pros of firmware updates: Free, often fixes known bugs, improves overall sensor performance beyond the original factory settings.
Cons: Requires a stable Bluetooth connection and adequate battery. Rare cases of failed updates can cause new problems. Some older models stop receiving updates.
Step 5: Recalibrate on a Proper Surface
The surface you use during calibration has a direct impact on accuracy. Accelerometers measure gravity’s pull to determine their orientation. If the surface is tilted even slightly, the sensor records that tilt as its “level” reference. Every measurement after that carries a built in error.
Use a hard, flat, non vibrating surface like a wooden table or concrete floor. Avoid carpet, rubber mats, or any surface that compresses under weight. These materials absorb vibrations unevenly and can shift the dumbbell’s position during calibration. Also stay away from surfaces near washing machines, speakers, or HVAC units that produce vibrations.
If you want to be precise, use a small bubble level to confirm your surface is truly flat. This extra step takes 10 seconds and eliminates one of the most overlooked sources of sensor error in home environments.
Pros: Costs nothing, dramatically improves calibration accuracy, easy to implement.
Cons: Finding a truly flat and vibration free surface can be difficult in some homes. Does not help if the sensor hardware is faulty.
Step 6: Clear Electromagnetic Interference
Smart dumbbells communicate via Bluetooth and contain sensitive electronic sensors. Electromagnetic interference from nearby devices can distort sensor readings and disrupt data transmission. Common sources include Wi Fi routers, microwave ovens, other Bluetooth devices, and even LED light dimmers.
Move your dumbbell at least 3 feet away from other electronic devices during calibration. Turn off nearby Bluetooth devices that are not needed. Multiple Bluetooth signals competing on the same frequency band can cause packet loss between the dumbbell and the app, which leads to missing or garbled sensor data.
After clearing potential interference sources, run the calibration process again. You may notice a significant improvement in sensor stability and connection reliability. Some users also report better results when they temporarily disable the 2.4 GHz band on their Wi Fi router, since Bluetooth operates on the same frequency.
Pros: Often resolves mysterious connection drops and data glitches that other fixes miss.
Cons: Inconvenient to rearrange your workout space. The interference source can be hard to identify.
Step 7: Manually Verify Weight Alignment
For smart dumbbells with auto adjusting or selectable weight plates, physical misalignment is a common culprit behind sensor errors. The weight plates must sit in exactly the right position for the magnetic or position sensors to detect them correctly. If a plate is slightly out of its slot, the sensor reads the wrong weight value.
Remove the dumbbell from its base and inspect the weight selection mechanism. Turn the dial or selector slowly and listen for clean clicks at each weight increment. If any position feels loose, sticky, or does not click firmly, the plates may need manual realignment. Consult your manual for instructions on reseating the weight plates.
Clean any dust or debris from the weight plate channels and the selection mechanism. Small particles can prevent plates from locking into their correct positions. A dry cloth or compressed air canister works well for this task.
Pros: Fixes weight detection errors at the source. Simple visual and tactile inspection.
Cons: Does not help with motion sensor drift. Requires some mechanical comfort. Disassembly beyond basic inspection may void your warranty.
Step 8: Test Calibration With Known Reference Movements
After completing any recalibration process, you need to verify that the sensors are reading correctly. Do not jump straight into a full workout. Instead, perform a controlled test with a simple, repeatable movement.
Pick a light weight setting and do exactly 10 slow bicep curls. Count each rep yourself and compare your count to the app’s count. The numbers should match exactly. If the app records 9 or 11 reps, the motion sensor calibration still has drift.
Next, check the weight reading. Set the dumbbell to a specific weight and confirm the display or app shows the correct number. If you have a kitchen scale or bathroom scale, you can even weigh the dumbbell independently to verify the load sensor’s accuracy.
Finally, test the form correction features if your model has them. Perform a few reps with intentionally bad form and see if the AI flags the error. This confirms that the gyroscope orientation data is being processed correctly by the sensor fusion algorithm.
When to Contact Manufacturer Support
Sometimes the problem goes beyond what a home recalibration can fix. If you have tried every step above and the sensors still read inaccurately, the issue is likely hardware related. Internal wiring may have come loose from repeated impacts. The load cell might be physically damaged. A sensor chip could have failed due to moisture exposure or age.
Contact the manufacturer’s support team and describe the exact symptoms. Include details about what troubleshooting steps you have already taken. This saves time and shows the support agent that the problem is not user error. Most smart dumbbell brands offer warranty coverage for sensor failures within the first one to two years.
Keep your proof of purchase and any correspondence with support. If the dumbbell is under warranty, the manufacturer will typically send a replacement or provide a repair service at no cost. Some brands also have authorized repair centers that can replace individual sensor components.
Preventing Future Sensor Calibration Issues
Prevention is always easier than repair. Store your smart dumbbells in a cool, dry place away from direct sunlight. Extreme heat can warp internal components and degrade adhesive that holds sensors in place. High humidity promotes corrosion on electrical contacts and sensor elements.
Charge your dumbbells regularly, even during periods when you are not using them. Lithium batteries that drain completely can lose calibration data stored in volatile memory. A monthly charge cycle keeps both the battery and the sensor baselines healthy.
Avoid dropping your dumbbells or slamming them onto hard surfaces. The accelerometers and gyroscopes inside are precision MEMS (Micro Electro Mechanical Systems) devices. A single hard impact can permanently shift their calibration or crack the microscopic internal structures.
Clean the exterior and charging contacts with a dry cloth after every workout. Sweat is corrosive to electronics. A quick wipe down takes 10 seconds and extends the life of your sensors by months or even years.
Comparing Software vs Hardware Calibration Fixes
Understanding the difference between software and hardware calibration helps you choose the right approach. Software fixes include app resets, firmware updates, and in app recalibration tools. These address problems caused by data corruption, algorithm errors, or communication bugs. They are free, fast, and carry minimal risk.
Hardware fixes involve physical inspection, cleaning contacts, realigning weight plates, or replacing sensor components. These address problems caused by physical damage, wear, or environmental degradation. They take more time, may require tools, and can void your warranty if done incorrectly.
Start with software fixes every time. They solve the majority of calibration issues and cost nothing. Move to hardware inspection only after software solutions have failed. And move to manufacturer support or professional repair only after both software and hardware inspection have been exhausted. This layered approach saves you time, money, and frustration.
Frequently Asked Questions
How often should I recalibrate my smart adjustable dumbbells?
Most manufacturers recommend a full sensor check every 3 to 6 months under normal use. If you work out daily or in high humidity environments, check every 1 to 2 months. You should also recalibrate after any firmware update, after a period of storage longer than 30 days, or anytime you notice inaccurate readings during your workout.
Can I recalibrate my smart dumbbells without the companion app?
Some models allow a basic hardware reset using a physical button on the dumbbell base. This clears sensor data and restores factory defaults. However, a full recalibration with axis mapping and sensor fusion optimization usually requires the companion app. Check your product manual to see what level of reset is available without the app.
Why does my smart dumbbell show the wrong weight after recalibration?
This usually means the weight plates are physically misaligned. The magnetic or position sensors read plate positions, not actual mass. If a plate is not fully seated in its slot, the sensor detects the wrong configuration. Remove the dumbbell from the base, manually cycle through each weight setting, and ensure every position clicks firmly into place.
Will a factory reset delete my workout history?
A factory reset on the dumbbell hardware erases data stored locally on the device. However, most companion apps sync your workout history to the cloud or your phone’s local storage. Your historical data is usually safe in the app even after a device reset. Confirm this with your specific brand’s support documentation before proceeding.
Can extreme cold or heat damage the sensors permanently?
Yes. Most smart dumbbell sensors are rated for operation between 32°F and 104°F (0°C to 40°C). Temperatures outside this range can cause permanent drift in accelerometer and gyroscope readings. Prolonged exposure to extreme conditions may also damage battery cells, which indirectly affects sensor performance. Always store your equipment indoors at room temperature.
Is sensor drift normal in smart fitness equipment?
Minor sensor drift over time is normal for all MEMS based sensors, including those in smart dumbbells. This is why periodic recalibration exists. The drift is usually small and gradual. Sudden large errors point to a specific problem like low battery, firmware corruption, or physical damage rather than natural drift.

Hi, I’m Sarah Hill — the founder and voice behind Heavy Lift Vault. I’m passionate about fitness, strength training, and health technology. I spend my time researching, testing, and reviewing workout equipment and health devices so you don’t have to guess. My goal is to deliver honest, detailed, and trustworthy reviews that help you invest wisely in your fitness journey.