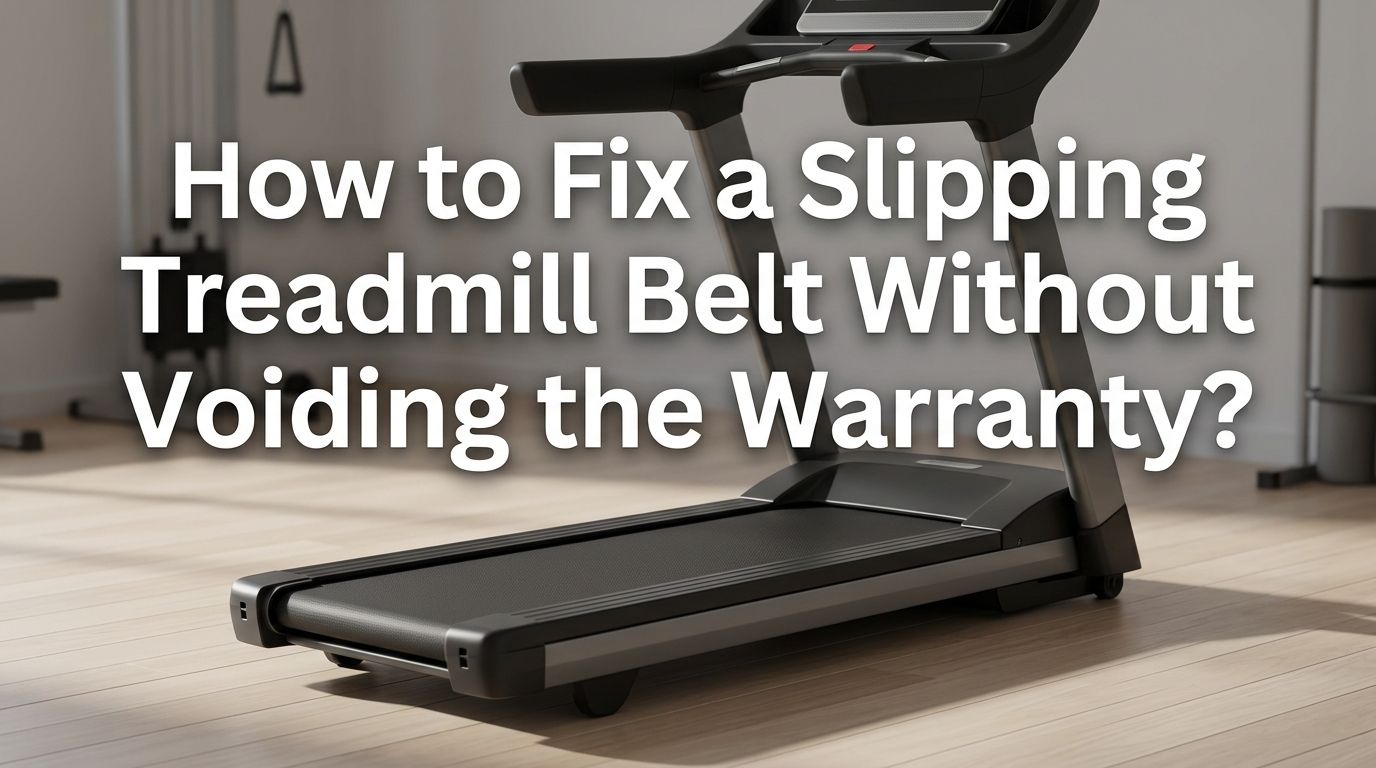
How to Fix a Slipping Treadmill Belt Without Voiding the Warranty?
You just started your morning run. The speed is set. Your stride is steady. Then suddenly, the belt stutters under your feet. That jarring slip breaks your rhythm and, worse, it can be dangerous.
A slipping treadmill belt is one of the most common problems home treadmill owners face, and the fear of voiding an expensive warranty stops many people from doing anything about it.
Here is the good news. Most treadmill manufacturers actually expect you to perform basic maintenance. In fact, failing to do routine upkeep like belt lubrication and tension checks can void your warranty faster than fixing the problem yourself.
In a Nutshell
- A slipping treadmill belt usually comes from one of four causes: loose belt tension, poor lubrication, misalignment, or a worn drive belt. Identifying the right cause is the first and most important step before attempting any fix.
- Basic maintenance like belt tightening and lubrication does not void most warranties. In fact, many manufacturer manuals include instructions for these tasks and require you to perform them regularly. Skipping maintenance can actually void your coverage.
- Always use the lubricant type your manufacturer recommends. Most brands require 100% silicone based lubricant. Using the wrong product, such as WD 40 or petroleum based sprays, can damage the belt and deck and will almost certainly void your warranty.
- Quarter turn adjustments are the golden rule for belt tensioning. Tighten the rear roller bolts only a quarter turn at a time, testing after each adjustment. Over tightening puts strain on the motor and rollers and can cause new problems.
- Know the difference between the walking belt and the drive belt. The walking belt is the large loop you step on. The drive belt is the smaller internal belt connecting the motor to the front roller. Fixing the drive belt often requires opening the motor housing, which may void your warranty unless done by a certified technician.
- Call in a professional if basic adjustments do not resolve the issue. Persistent slipping after tension and lubrication fixes could signal a worn deck, a failing motor controller, or an aging drive belt. These repairs are best handled under warranty service to protect your coverage.
What Causes a Treadmill Belt to Slip
A treadmill belt slips when it loses proper grip on the rollers or deck beneath it. This happens for several reasons, and understanding the root cause saves you time and money.
The most common cause is insufficient lubrication. The walking belt sits on top of a deck, and friction between these two surfaces increases over time. Without proper lubrication, the belt drags, overheats, and begins to slip. Many owners do not realize that lubrication should happen every three to six months depending on usage.
Loose belt tension is the second most frequent culprit. Over time, the belt stretches slightly from regular use. When it becomes too loose, it cannot maintain traction on the front and rear rollers. You will notice this most during running or fast walking, when your body weight pushes down on the belt.
Misalignment can also cause slipping. If the belt shifts to one side, it creates uneven tension. This uneven pull can make the belt hesitate or stutter. Finally, a worn drive belt (the small belt connecting the motor to the front roller) can cause the entire system to lose power transfer. A telltale sign is black rubber dust underneath the treadmill.
How to Tell If Your Treadmill Belt Is Actually Slipping
Before you grab tools, you need to confirm the belt is truly slipping. Some symptoms look like belt slip but come from other issues entirely.
The classic test is simple. Walk on the treadmill at a moderate speed. Press your foot down firmly and hold it in place for a second. If the belt pauses, stutters, or slides under your foot while the motor keeps running, the belt is slipping. You may also feel a sudden jerk forward as the belt catches again.
Another sign is inconsistent speed. If the belt seems to slow down and speed up on its own, that points to a tension or drive belt problem. Listen for unusual sounds too. A squeaking or grinding noise from the front roller area often indicates a worn drive belt.
Check under the treadmill as well. Black dust or rubber particles on the floor beneath the machine suggest the drive belt is wearing down. This dust comes from the internal belt degrading against the pulleys. If you see this, the issue is likely deeper than a simple walking belt adjustment and may need professional attention.
Understanding Your Treadmill Warranty Before You Start
This step is critical. Read your warranty document before touching a single bolt. Most treadmill warranties have separate coverage periods for the frame, motor, parts, and labor. The walking belt and deck often fall under “wear items” with shorter coverage.
The good news is that most manufacturers consider belt tensioning, alignment, and lubrication to be standard user maintenance. Brands like NordicTrack, Sole, Horizon, and ProForm include these instructions directly in their owner’s manuals. Performing these tasks does not void the warranty. In fact, neglecting them can.
What will void your warranty? Opening the motor housing, replacing electrical components, using unapproved lubricants, and modifying the frame or electronics. Some brands also void coverage if you store the treadmill in a garage or unheated space due to humidity and temperature concerns.
Pro tip: Keep a simple maintenance log. Write down dates when you lubricate, adjust tension, and clean the belt. If you ever need warranty service, this log proves you maintained the machine properly. It protects you from a manufacturer claiming neglect.
Tools You Need for a Safe Belt Fix
You do not need a full workshop to fix a slipping treadmill belt. The right tools are simple, affordable, and likely already in your home.
An Allen wrench (hex key) is the most important tool. Most treadmill rear roller bolts use a 5mm or 6mm Allen wrench. Check your owner’s manual for the correct size. Many treadmills come with one included in the box.
You will also need 100% silicone based treadmill lubricant. This is not optional. Do not substitute with household oils, cooking spray, WD 40, or petroleum products. These alternatives damage the belt and deck material. Only pure silicone lubricant is safe for most treadmill brands.
A clean cloth or rag helps you wipe away old lubricant residue and dust from the deck surface. A flashlight is useful for inspecting the drive belt and looking under the machine. Finally, keep your owner’s manual nearby for reference on bolt locations, proper belt lift height, and any brand specific instructions.
Pros of DIY maintenance: No service call costs, quick turnaround, and you learn your machine better.
Cons of DIY maintenance: Risk of over tightening bolts, using the wrong lubricant, or missing a deeper mechanical issue that needs professional repair.
How to Tighten a Loose Treadmill Belt
Belt tightening is the most common fix for a slipping belt. It is straightforward and safe for your warranty when done correctly.
Step 1: Turn off the treadmill and unplug it from the wall. Safety comes first. Never work on a powered machine.
Step 2: Locate the two adjustment bolts at the rear end of the treadmill. These bolts sit on either side of the rear roller.
Step 3: Using your Allen wrench, turn both bolts clockwise by exactly one quarter turn. Always adjust both sides equally. This keeps the belt centered and prevents misalignment.
Step 4: Plug the treadmill back in. Turn it on at a low speed (about 1 to 2 mph) without stepping on it. Watch the belt for smooth, centered movement.
Step 5: Step on the belt and walk at moderate speed. Press your foot down firmly to test for slipping. If the belt still slips, repeat the process with another quarter turn on each side.
The lift test confirms proper tension. Stand beside the treadmill and grab the belt at its center edge. You should be able to lift it about two to three inches off the deck. If you can lift it higher, the belt is still too loose. If you cannot lift it at all, you have over tightened it. Over tightening strains the motor and bearings and shortens their lifespan.
How to Lubricate Your Treadmill Belt Properly
Lubrication reduces friction between the belt and the deck. It is the single most important maintenance task for preventing belt slip and extending belt life.
Step 1: Turn off and unplug the treadmill.
Step 2: Lift one side of the walking belt gently. You should be able to slide your hand underneath it. If the belt is too tight to lift, loosen the rear roller bolts slightly first.
Step 3: Apply the silicone lubricant along the center of the deck surface, from front to back. Most manufacturers recommend applying about one tablespoon (15ml) of lubricant per side. Squeeze the lubricant in a zigzag pattern for even coverage.
Step 4: Repeat on the other side. Then lower the belt and turn the treadmill on at the lowest speed for two to three minutes without stepping on it. This distributes the lubricant evenly across the deck surface.
Step 5: Wipe any excess lubricant from the belt edges with a clean cloth.
Pros of regular lubrication: Prevents belt slip, reduces motor strain, extends belt and deck life, and keeps the warranty valid.
Cons if done incorrectly: Using the wrong lubricant type can ruin the belt and void coverage. Over lubricating creates a slippery surface that takes time to absorb.
Check your manual for lubrication frequency. Most brands recommend every three to six months, or every 130 to 180 miles of use.
How to Realign a Treadmill Belt That Drifts to One Side
A misaligned belt creates uneven tension and can cause slipping on one side. Alignment is easy to fix and does not affect your warranty.
Step 1: Turn off the treadmill and unplug it. Make sure the machine is on a flat, level surface. An uneven floor can cause the belt to drift.
Step 2: Plug the treadmill back in and start it at a slow speed (about 1 mph) with no one standing on it.
Step 3: Watch the belt carefully. If it drifts to the left, tighten the left rear roller bolt a quarter turn clockwise. If it drifts to the right, tighten the right rear roller bolt a quarter turn clockwise.
Step 4: Wait 30 seconds after each adjustment to let the belt settle into its new position. The belt may take a few rotations to respond to the change.
Step 5: Repeat as needed until the belt runs centered with equal spacing on both sides.
A key mistake to avoid is adjusting both bolts at the same time during alignment. Unlike tension adjustments where you turn both equally, alignment corrections require adjusting only one side at a time. This is what shifts the belt left or right.
If the belt keeps drifting despite repeated adjustments, the belt itself may be stretched unevenly. A worn or warped belt needs replacement, and that repair is best requested through warranty service.
The Difference Between the Walking Belt and the Drive Belt
Many treadmill owners do not realize their machine has two separate belts. Confusing them can lead to the wrong fix or even an accidental warranty violation.
The walking belt is the large loop surface you walk and run on. It wraps around the front and rear rollers. This belt is accessible from the outside and all user maintenance (tensioning, aligning, lubricating) applies to it. Adjusting the walking belt is considered standard upkeep by virtually all manufacturers.
The drive belt is a smaller, internal belt that connects the motor to the front roller. It transfers power from the motor to spin the roller, which moves the walking belt. This belt is typically hidden inside the motor cover or front shroud.
Signs of a worn drive belt include: black rubber dust under the treadmill, a burning rubber smell, and the walking belt slowing down while the motor still sounds like it is running at full speed. If the front roller spins but the walking belt does not move, the drive belt is likely the problem.
Here is the warranty concern. Replacing or adjusting the drive belt usually requires removing the motor cover. On many brands, opening the motor housing is specifically listed as a warranty voiding action unless performed by an authorized technician. If you suspect a drive belt issue, contact your manufacturer’s service department first.
When to Call a Professional Instead of Fixing It Yourself
Not every slipping belt can be fixed with a wrench and lubricant. Some problems require professional tools and expertise, and attempting them yourself puts your warranty at risk.
Call a professional if the belt continues to slip after you have properly tightened and lubricated it. Persistent slipping could mean the deck surface is worn smooth and no longer provides enough friction. Deck replacement is a major repair that should be handled under warranty.
Motor or controller issues can also cause belt hesitation. If the motor slows down, pulses, or makes a whining sound, the problem is electrical. Electrical repairs require opening the motor compartment and testing circuit boards. This is firmly in professional territory.
If you see black dust under the machine, the drive belt needs attention. A certified technician can replace the drive belt quickly and keep your warranty intact. Most manufacturers have a network of authorized service providers who can come to your home.
Pros of professional repair: Warranty stays intact, correct diagnosis, and access to original replacement parts.
Cons of professional repair: Can take days to schedule, may involve service call fees even under warranty, and requires being home for the appointment.
Common Mistakes That Void Your Treadmill Warranty
Knowing what to avoid is just as important as knowing what to do. These mistakes are surprisingly common and can cost you your warranty coverage.
Using the wrong lubricant is the number one mistake. WD 40, vegetable oil, 3 in 1 oil, and petroleum based sprays all damage treadmill decks and belts. Some treadmill brands, like TRUE Fitness, require their own branded lubricant to keep the warranty valid. Always check your manual.
Over tightening the belt puts extreme stress on the front and rear roller bearings and the motor. This causes premature wear on parts that would otherwise last for years. Remember the rule: quarter turns only, test between each adjustment.
Opening the motor cover voids the warranty on most consumer treadmills. Even if you are just looking inside, manufacturers may deny future claims if they find evidence of unauthorized access. Leave motor compartment work to certified technicians.
Ignoring maintenance entirely is another warranty killer. Many warranties include a clause that requires regular user maintenance. If a technician arrives and finds a bone dry, dust caked deck, the manufacturer can claim neglect and deny the service claim.
Exceeding the weight capacity accelerates belt and motor wear. This does not directly void the warranty, but the damage it causes is typically not covered.
How to Prevent Your Treadmill Belt From Slipping Again
Prevention is easier and cheaper than repair. A few simple habits will keep your belt running smoothly for years.
Lubricate on schedule. Set a reminder every three months. If you use the treadmill daily, lubricate closer to every six to eight weeks. Consistent lubrication is the single best thing you can do for your machine.
Clean the belt and deck regularly. Dust, pet hair, and debris work their way under the belt and increase friction. Wipe the belt surface with a damp cloth once a week. Vacuum around and under the treadmill monthly.
Check belt tension every month. A quick lift test takes 10 seconds. If you can lift the belt more than three inches at the center edge, it needs a slight tightening. Catching a loose belt early prevents slipping and uneven wear.
Keep the treadmill on a flat surface. An uneven floor causes the belt to drift, which leads to uneven tension. A treadmill mat on carpet or uneven flooring helps stabilize the machine.
Stay within the weight limit. Every treadmill has a maximum user weight. Staying within this limit reduces stress on the belt, motor, and rollers. This keeps all components within their designed operating range and supports any future warranty claims.
What to Do If Your Warranty Claim Gets Denied
Sometimes manufacturers deny warranty claims even when you have done everything right. You still have options.
Start by requesting the denial in writing. Ask the manufacturer to specify exactly which warranty term you allegedly violated. This forces them to be specific and gives you documentation to work with.
Review your warranty terms carefully. Compare the reason for denial against the actual warranty language. If the manufacturer claims you failed to maintain the machine but you have a maintenance log, present that evidence. If they claim unauthorized modification but you only performed tasks listed in the owner’s manual, push back.
Contact consumer protection agencies in your state or country. In the United States, the Magnuson Moss Warranty Act protects consumers from unfair warranty denials. Under this law, a manufacturer cannot void your entire warranty just because you performed your own maintenance, as long as you did not cause the damage.
Escalate within the company. Call the manufacturer’s customer service line and ask to speak with a supervisor or the warranty claims department. Be polite, present your evidence, and be persistent. Many initial denials are reversed after escalation.
Pros of disputing a denial: You may get full coverage restored and the repair completed at no cost.
Cons of disputing a denial: It takes time, requires documentation, and there is no guarantee of a reversal.
Step by Step Quick Reference Guide
Here is a condensed version of the full process you can print and keep near your treadmill for easy reference.
For a slipping belt, follow this order: First, check lubrication. Lift the belt edge and feel the deck surface. If it is dry, apply silicone lubricant and test again. Second, check tension. Perform the lift test at the center edge. Tighten the rear bolts a quarter turn on each side if the belt lifts more than three inches.
For a drifting belt: Identify which direction the belt moves. Tighten the rear bolt on the same side the belt drifts toward, one quarter turn at a time. Wait 30 seconds between adjustments.
For persistent slipping after tension and lubrication fixes: Inspect under the treadmill for black dust. If present, the drive belt is worn. Contact your manufacturer for authorized service.
For any motor noise, burning smell, or electrical issue: Stop using the treadmill immediately. Unplug it. Contact the manufacturer. Do not open the motor cover. These symptoms can indicate serious electrical problems that are dangerous to diagnose without training.
Always remember: Unplug before adjusting. Quarter turns only. Use only manufacturer approved silicone lubricant. Keep records of every maintenance task.
Frequently Asked Questions
How often should I lubricate my treadmill belt to prevent slipping?
Most manufacturers recommend lubricating every three to six months under normal use. If you use your treadmill daily or for long sessions, lubricate every six to eight weeks. Always use 100% silicone based lubricant approved by your treadmill brand. Check the owner’s manual for your specific model’s recommendations, as some brands like NordicTrack’s commercial line use pre waxed decks that should not be lubricated at all.
Will tightening my treadmill belt void the warranty?
No. Belt tension adjustment is considered standard user maintenance by virtually all treadmill manufacturers. Most owner’s manuals include step by step instructions for this exact task. In fact, failing to maintain proper belt tension could void your warranty under neglect clauses. Just be sure to follow the quarter turn rule and avoid over tightening.
How do I know if the problem is the walking belt or the drive belt?
The walking belt is the surface you step on. If it slips under your feet but the rollers are still spinning, the walking belt needs tension or lubrication. The drive belt is internal, connecting the motor to the front roller. If the motor sounds like it is running but the belt barely moves, or if you see black rubber dust under the machine, the drive belt is likely worn and needs professional replacement.
Can I use WD 40 or household oil on my treadmill belt?
Absolutely not. WD 40, cooking oil, vegetable oil, 3 in 1 oil, and petroleum based products will damage the belt and deck surface. They break down the materials and create buildup that increases friction over time. Using any of these products will void your warranty and could permanently damage your treadmill.
What should I do if my treadmill belt keeps slipping after I tighten and lubricate it?
If basic maintenance does not solve the slipping, the problem likely goes deeper. The deck surface may be worn, the drive belt may need replacement, or the motor controller could be failing. Stop using the treadmill and contact the manufacturer’s warranty service department. Continuing to use a slipping treadmill can cause further damage and may compromise your safety during workouts.

Hi, I’m Sarah Hill — the founder and voice behind Heavy Lift Vault. I’m passionate about fitness, strength training, and health technology. I spend my time researching, testing, and reviewing workout equipment and health devices so you don’t have to guess. My goal is to deliver honest, detailed, and trustworthy reviews that help you invest wisely in your fitness journey.